Key Takeaway
- Exporting Salesforce reports to Excel is essential for deeper analysis. Excel enables advanced calculations, custom formatting, data blending, and offline analysis that go beyond Salesforce’s native reporting and dashboards.
- Salesforce offers multiple export methods, each with trade-offs. Manual exports from Lightning and Classic are quick but limited by row caps and formatting constraints, while the Data Export tool is better suited for full data backups than targeted analysis.
- Automation significantly improves reliability and efficiency. Third-party tools and API-based solutions eliminate repetitive manual exports, ensure consistent formatting, reduce errors, and keep Excel files continuously up to date.
- Understanding export limits and permissions prevents data loss. Common issues like missing rows, formatting errors, and export failures are often caused by row limits, incorrect export options, or insufficient user permissions.
- Best practices protect data accuracy and usability in Excel. Preparing reports before export, using standardized Excel templates, documenting export context, and maintaining version control ensure exported data remains trustworthy and actionable.
Your sales manager just asked for the quarterly pipeline breakdown—with custom calculations that Salesforce dashboards can’t handle. Your finance team needs opportunity data formatted specifically for their forecasting model. Your marketing director wants lead conversion metrics blended with campaign performance data from another platform.
And they all need it in Excel. By tomorrow morning.
If you’ve ever found yourself frantically clicking through Salesforce reports trying to get clean data into a spreadsheet, you’re not alone. What seems like it should be a simple task—exporting Salesforce reports to Excel—often becomes a frustrating exercise in troubleshooting missing data, reformatting columns, and piecing together information from multiple exports.
The challenges multiply quickly: reports that look complete on screen but export with missing rows, formatting that breaks during export, scheduled reports that need manual intervention, and the constant worry that you’re missing critical data that will lead to flawed analysis.
Exporting Salesforce reports to Excel is more than a convenience—it’s often the critical bridge between your CRM data and the analysis tools your team relies on for decision-making. This guide walks you through everything from basic manual exports to sophisticated automation solutions that will transform this daily headache into a streamlined, reliable process.
Understanding Salesforce Reports
What is a Salesforce Report?
Before diving into export methods, let’s clarify what we’re working with. Salesforce reports are structured views of your CRM data, designed to answer specific business questions. They come in several formats:
- Tabular reports: Straightforward lists of records and fields, similar to spreadsheet data
- Summary reports: Grouped data with subtotals and grand totals
- Matrix reports: Complex cross-tabulations showing relationships between different data dimensions
- Joined reports: Multiple report blocks side by side, each with its own set of records
Each report type serves different analytical needs, but they all share a common limitation: they live inside Salesforce, where your ability to manipulate, share, and integrate the data is constrained by the platform’s native capabilities.
Importance of Exporting Reports to Excel
Why export to Excel when Salesforce has its own reporting tools? The reasons are practical and immediate:
- Advanced calculations: Excel formulas and functions go far beyond what Salesforce formula fields can do
- Data integration: Combine Salesforce data with information from other systems
- Visualization flexibility: Create custom charts and graphs that Salesforce dashboards can’t produce
- Offline access: Work with your data without an internet connection
- Familiar interface: Most business users already know how to analyze data in Excel
For many organizations, Excel remains the universal language of business analysis—the place where data becomes actionable insight. Getting your Salesforce products data into this format isn’t just convenient; it’s essential for comprehensive business intelligence.
Methods to Export Salesforce Reports to Excel
Manual Export
Steps to Export a Report from Salesforce Lightning to Excel
The most straightforward approach is a manual export from the Lightning interface:
- Navigate to the Reports tab in Salesforce
- Find and open the report you want to export
- Click the dropdown arrow next to “Edit” in the upper right
- Select “Export”
- Choose between “Formatted Report” (preserves formatting but has limitations) or “Details Only” (raw data)
- Select your preferred format (Excel .xlsx or .csv)
- Click “Export” and save the file to your computer
This process takes less than a minute but comes with important considerations. The “Formatted Report” option maintains your groupings, subtotals, and formatting—but it can only export what’s visible on screen (up to 2,000 rows for matrix reports or 100,000 rows for other types). The “Details Only” option gives you raw data without formatting, but can export all underlying records up to Salesforce’s limits.
Steps to Export a Report from Salesforce Classic to Excel
If you’re still using Salesforce Classic, the process differs slightly:
- Go to the Reports tab
- Find your report in the folder structure
- Click the report name to run it
- Look for the “Export Details” button at the top of the report
- Choose your preferred format (.xlsx or .csv)
- Click “Export” and save the file
Classic also offers a “Printable View” option that functions similarly to the “Formatted Report” option in Lightning, preserving visual organization at the cost of potential data limitations.
Automated Export Solutions
Using Salesforce Data Export Tool
For comprehensive data backups rather than specific reports, Salesforce offers a native Data Export tool:
- From Setup, enter “Data Export” in the Quick Find box
- Select “Data Export” under “Data Management”
- Choose “Export Now” or “Schedule Export” (available weekly or monthly depending on your edition)
- Select the data you want to include
- Click “Start Export” or “Save”
This approach exports your entire database as CSV files in a compressed .zip archive—useful for backups but often too comprehensive for targeted analytical needs.
Leveraging Third-party Tools
Several specialized tools can streamline the export process:
- XL-Connector: An Excel add-in that pulls Salesforce data directly into spreadsheets with refreshable connections
- Coupler.io: Automates exports to Excel, Google Sheets, or databases on a schedule
- Zapier: Creates workflows that trigger exports based on specific events
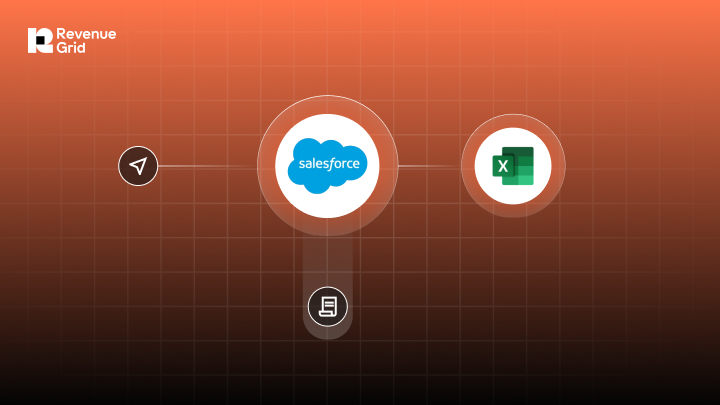
- Revenue Grid: Offers seamless Salesforce integration with advanced reporting capabilities
These solutions eliminate manual steps and ensure your Excel files always contain current data—critical for teams that make decisions based on frequently changing Salesforce information.
Automating Salesforce Report Exports
Benefits of Automation
Manual exports work for occasional needs, but automation delivers transformative advantages:
- Time savings: Eliminate hours spent on repetitive export tasks
- Consistency: Ensure reports follow the same format every time
- Reduced errors: Remove the human element from the export process
- Fresh data: Always work with current information without manual updates
- Scalability: Support more frequent reporting without additional effort
For teams that regularly analyze Salesforce data in Excel, automation isn’t a luxury—it’s a necessity for maintaining efficiency and data reliability.
How to Set Up Automated Exports
Using Salesforce API
For technical teams, Salesforce’s API offers programmatic export capabilities:
- Use the Reports and Dashboards REST API to request report data
- Write code that formats the response as an Excel file
- Schedule the code to run at desired intervals
- Configure delivery of the resulting files to appropriate locations
This approach requires development resources but offers maximum flexibility for custom export workflows. Organizations with complex requirements often leverage Salesforce triggers to initiate exports based on specific data changes.
Integrating with Revenue Grid for Enhanced Automation
Revenue Grid offers a more accessible path to automation:
- Connect your Salesforce and Microsoft environments
- Configure which reports should be exported and how frequently
- Specify destination folders and formatting preferences
- Set up notifications for successful exports or errors
This approach combines the reliability of scheduled exports with the flexibility to transform data during the export process—ensuring your Excel files are immediately ready for analysis without manual formatting.
Troubleshooting Common Export Issues
Incomplete Exports
One of the most frustrating export problems is missing data. If your exports contain fewer records than expected, check these common causes:
- Display limit confusion: Salesforce only shows 2,000 records on screen, but your report might contain more. Use “Details Only” export to get all records.
- Row limitations: Different export methods have different caps (2,000 rows for matrix reports with “Formatted Report,” 100,000 rows for other types).
- Filter issues: Verify that report filters aren’t unintentionally excluding data.
- Permission problems: Users can only export records they have permission to view.
For large datasets, consider breaking your report into smaller segments or using Data Loader, which supports up to 5 million records per export.
Formatting Problems
Excel formatting issues often plague exports:
- Date formatting: Dates may appear as text or in unexpected formats
- Number conversion: Currency fields might lose their symbols or decimal places
- Text truncation: Long text fields get cut off at 255 characters
- Column width: Excel often doesn’t automatically adjust column widths to fit data
Create a simple Excel template with proper formatting for each column, then paste in your exported data to maintain consistent formatting across exports.
Permission Errors and Solutions
If you can’t export reports at all, check these permission issues:
- Export Reports permission: This specific permission must be enabled in your profile
- Report folder access: You need at least “View” access to the folder containing the report
- Field-level security: You can only export fields you have permission to see
- Role hierarchy limitations: Some organizations restrict exports based on your role
Work with your Salesforce administrator to ensure you have the necessary permissions for your reporting needs. For organizations using Salesforce Revenue Cloud, additional permission considerations may apply.
Best Practices for Exporting Salesforce Reports
Preparing Your Report for Export
Set yourself up for success before clicking “Export”:
- Include only necessary fields: Streamline your report to include only data you’ll actually use
- Order columns logically: Arrange fields in the order you’ll need them in Excel
- Use consistent naming: Standardize field names to make exports more readable
- Test with a small dataset: Verify formatting and completeness with a filtered sample before exporting everything
- Document filter criteria: Note what filters are applied so others understand the data’s context
Taking these steps before export saves significant time compared to reorganizing data after it’s in Excel.
Custom Data Formatting Options
Maximize usability with these formatting strategies:
- Create Excel templates: Build templates with pre-configured formulas, formatting, and pivot tables
- Use Excel’s data import features: Set up data connections that preserve formatting when refreshed
- Leverage conditional formatting: Highlight important values or exceptions automatically
- Create named ranges: Define ranges that make it easier to reference exported data in formulas
These approaches transform raw exports into analytical tools that immediately highlight insights without manual formatting.
Maintaining Data Integrity in Excel
Protect your data’s accuracy with these practices:
- Document export date/time: Always note when data was exported to provide context
- Preserve original exports: Save the raw export file before making modifications
- Use version control: Implement file naming conventions that track versions
- Validate calculations: Cross-check Excel calculations against Salesforce reports
- Restrict editing: Protect cells containing raw data to prevent accidental changes
These safeguards ensure that decisions made using exported data are based on accurate information, not corrupted or outdated exports.
Conclusion: Enhance Your Workflow with Revenue Grid
Why Choose Revenue Grid for Salesforce Integration
Exporting Salesforce reports to Excel shouldn’t be a daily struggle. While Salesforce offers basic export functionality, organizations that rely on regular, accurate data exports need a more robust solution.
Revenue Grid transforms how your team works with Salesforce data by providing:
- Seamless automation: Schedule exports to run exactly when you need them
- Format preservation: Maintain consistent formatting without manual intervention
- Complete datasets: Access all your data without artificial row limitations
- Intelligent delivery: Send exports directly to shared folders, team members, or other systems
- Error monitoring: Receive alerts if exports fail or contain unexpected data
Beyond simple exports, Revenue Grid connects your entire Salesforce and Outlook environments, creating a unified workflow that eliminates the constant switching between systems that drains productivity.
How Revenue Grid Streamlines Your Reporting Process
Organizations using Revenue Grid transform their reporting workflows:
- Sales teams receive updated pipeline reports in their inbox every morning, formatted and ready for review
- Executives get customized dashboards that blend Salesforce data with information from other systems
- Finance departments automate the export of opportunity data directly into their forecasting models
- Marketing teams track campaign performance with exports that automatically update their analytics tools
The result isn’t just time saved—it’s increased confidence in your data and more timely insights that drive better business decisions. With reliable, automated exports, your team can focus on analyzing data rather than extracting it.
Ready to transform how your team works with Salesforce data? Book a demo to see how Revenue Grid can streamline your reporting process and eliminate the frustration of manual exports.
What are the best practices for exporting Salesforce reports to Excel?
The most effective practices include: preparing reports with only necessary fields before export, using “Details Only” export for complete data sets, documenting export dates and filter criteria, creating standardized Excel templates for consistent formatting, and implementing automation for regularly needed reports. For critical business data, always verify that export totals match what you see in Salesforce to ensure completeness.
How can I maintain data accuracy while exporting Salesforce reports?
Maintain accuracy by using “Details Only” export for complete datasets, verifying row counts match between Salesforce and Excel, preserving original exports before manipulation, documenting export criteria and timestamps, and implementing version control for exported files. For reports containing calculated fields, cross-check that Excel formulas produce the same results as Salesforce’s native calculations.
What tools are available to automate Salesforce report exports?
Several tools can automate exports, including: Salesforce’s native scheduled report subscriptions (email only), XL-Connector for direct Excel integration, Coupler.io for scheduled exports to various destinations, Zapier for trigger-based workflows, Power Automate for Microsoft ecosystem integration, and Revenue Grid for comprehensive Salesforce-to-Excel automation with advanced formatting capabilities.
Can I schedule automatic exports of Salesforce reports to Excel?
Salesforce doesn’t offer native scheduling for direct Excel exports, but you have several options: use report subscriptions to email reports as attachments on a schedule, leverage Data Export for weekly/monthly full database exports, or implement third-party tools like Revenue Grid, XL-Connector, or Coupler.io that offer true scheduling with direct delivery to specified locations.
What should I do if my export from Salesforce to Excel fails?
When exports fail, follow this troubleshooting sequence: verify you have the “Export Reports” permission, check that you’re not exceeding row limits (use “Details Only” for large datasets), ensure you have access to all fields in the report, try exporting in a different format (.xlsx vs .csv), clear your browser cache, and use a different browser if problems persist. For critical exports, consider using Data Loader which handles larger volumes more reliably.