Opt In Prospects into Revenue Grid
This article describes two scenarios of how to opt in prospects who currently have the “Opted out” status on the Audience page in Revenue Grid:
Opt in prospects from a CSV file
The guidelines provided below are applicable in the case where the prospect status doesn’t get synced with Salesforce, i.e., prospects in RG are not linked to Leads/Contacts in Salesforce and none of their data is retrieved from Salesforce.
Preconditions for using CSV files
First, make sure that the settings are configured correctly to allow users to work with CSV files.
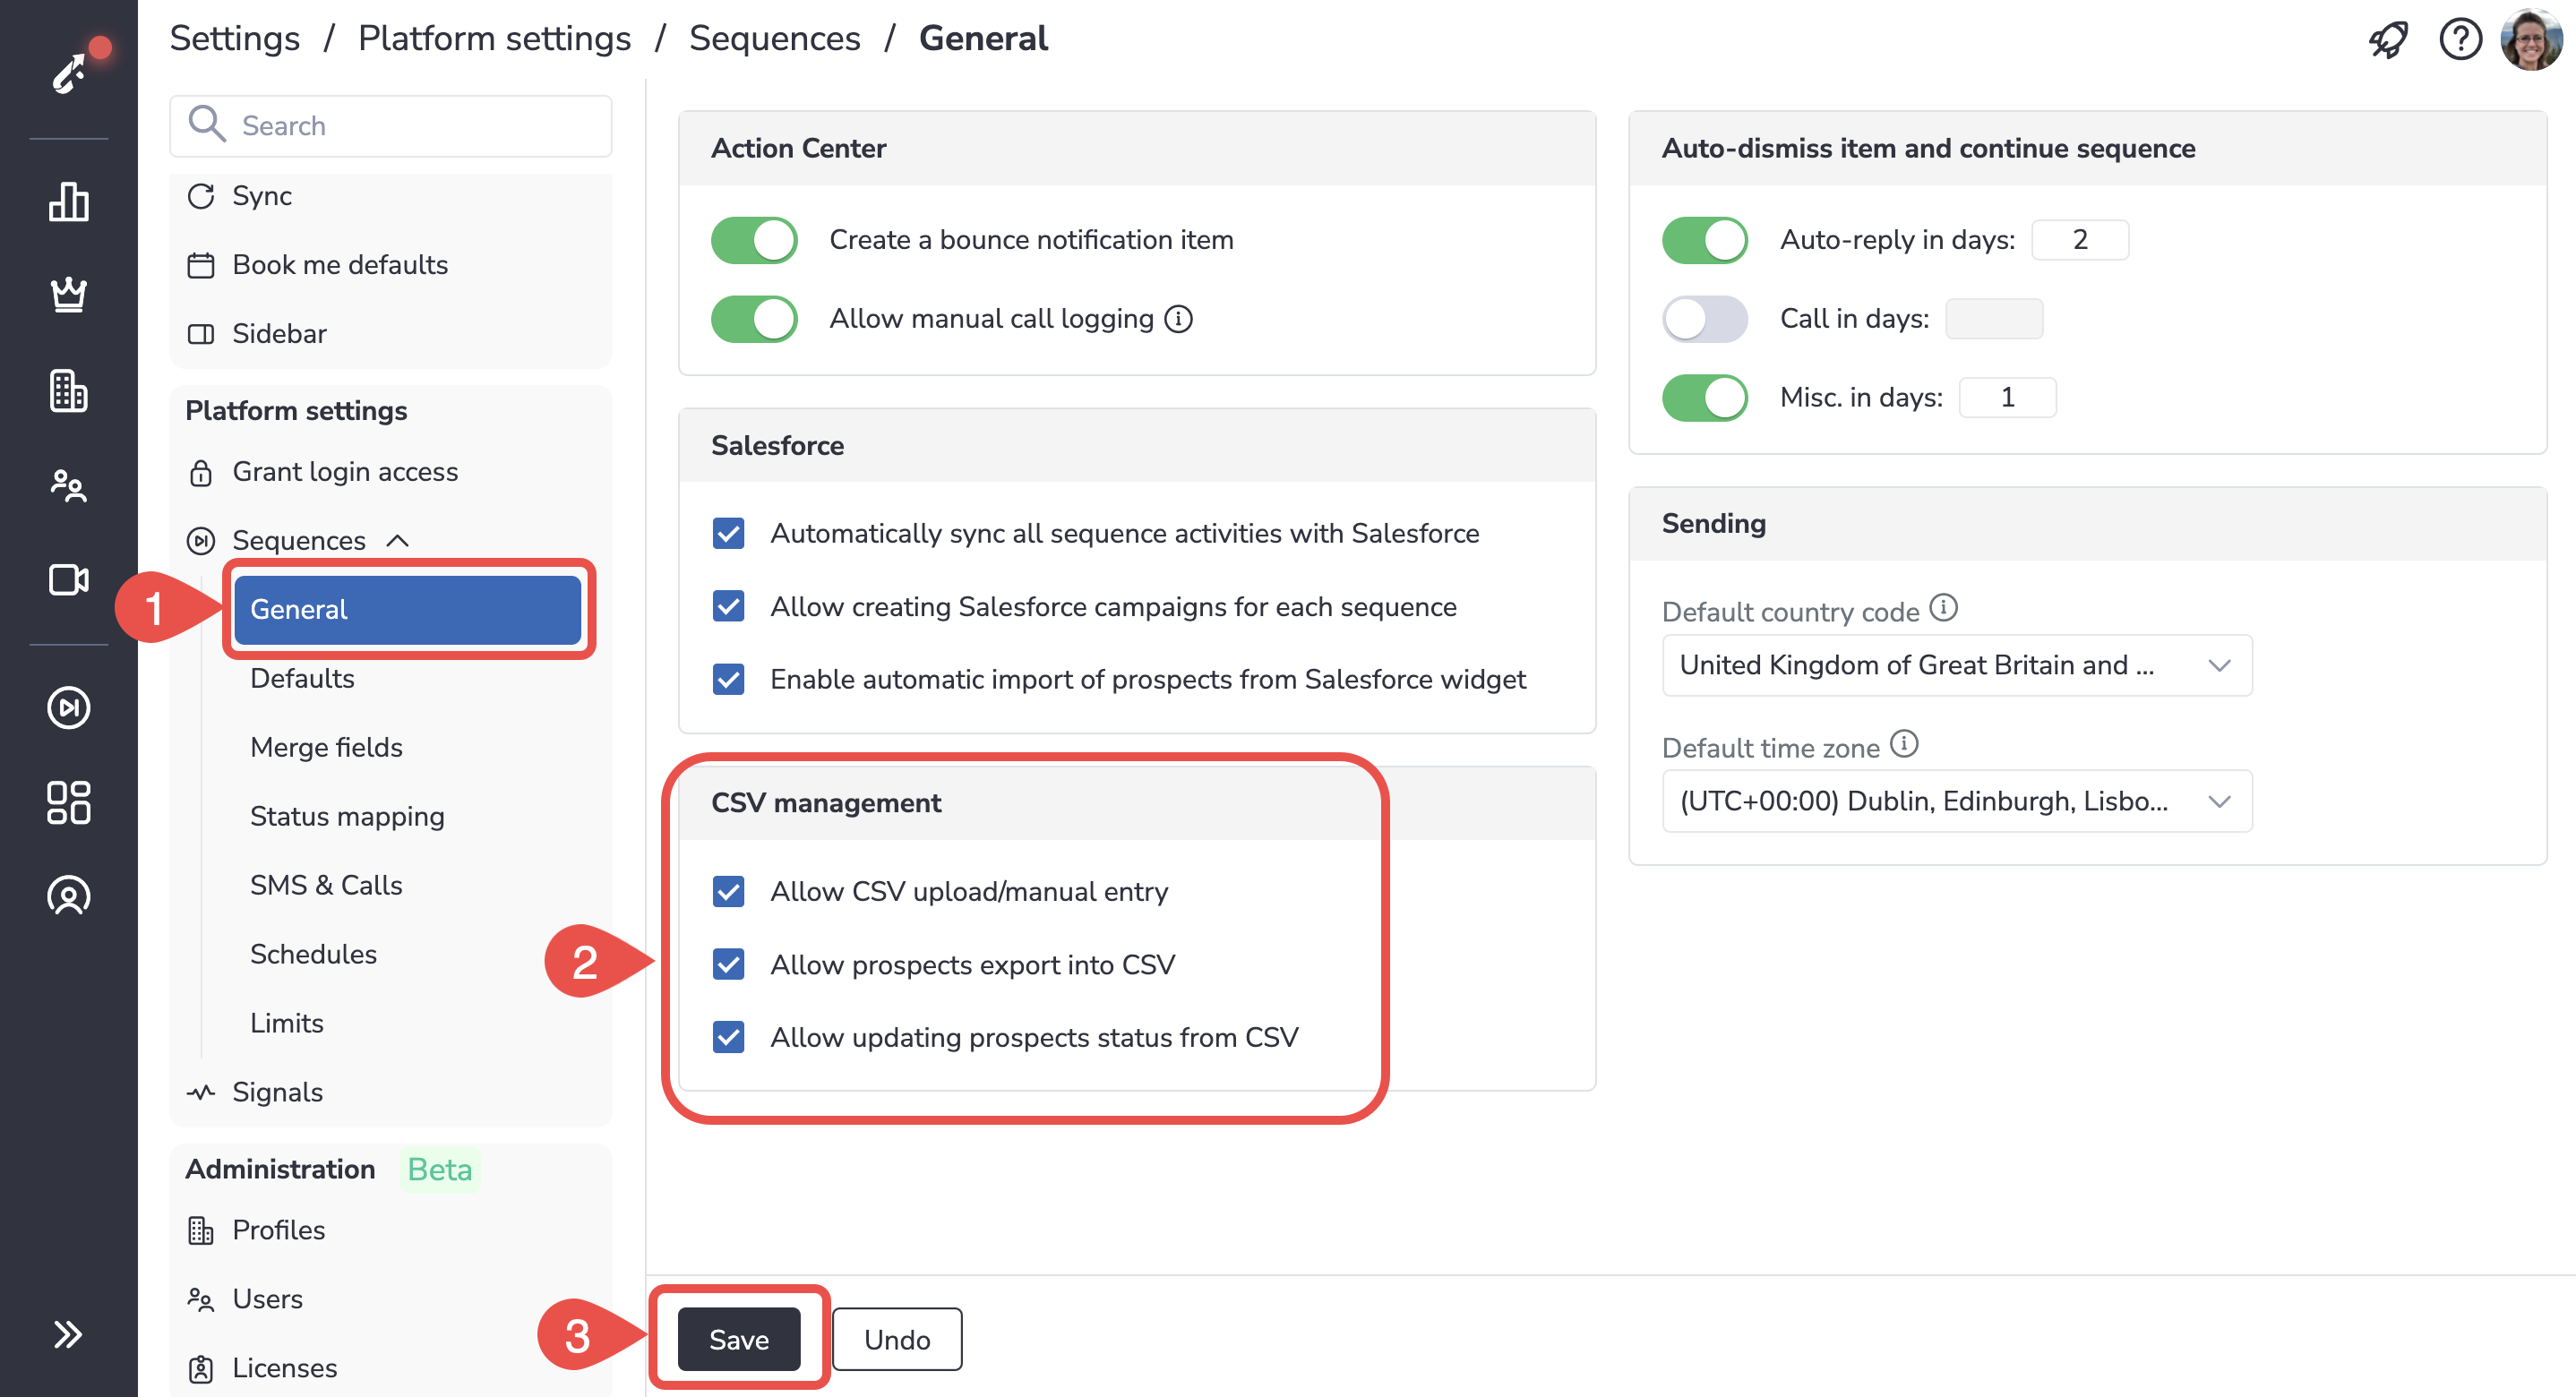
Enable CSV management in Platform settings
-
Go to Settings → Platform settings → Sequences → General
-
Enable all checkboxes in the CSV management section
-
Click Save
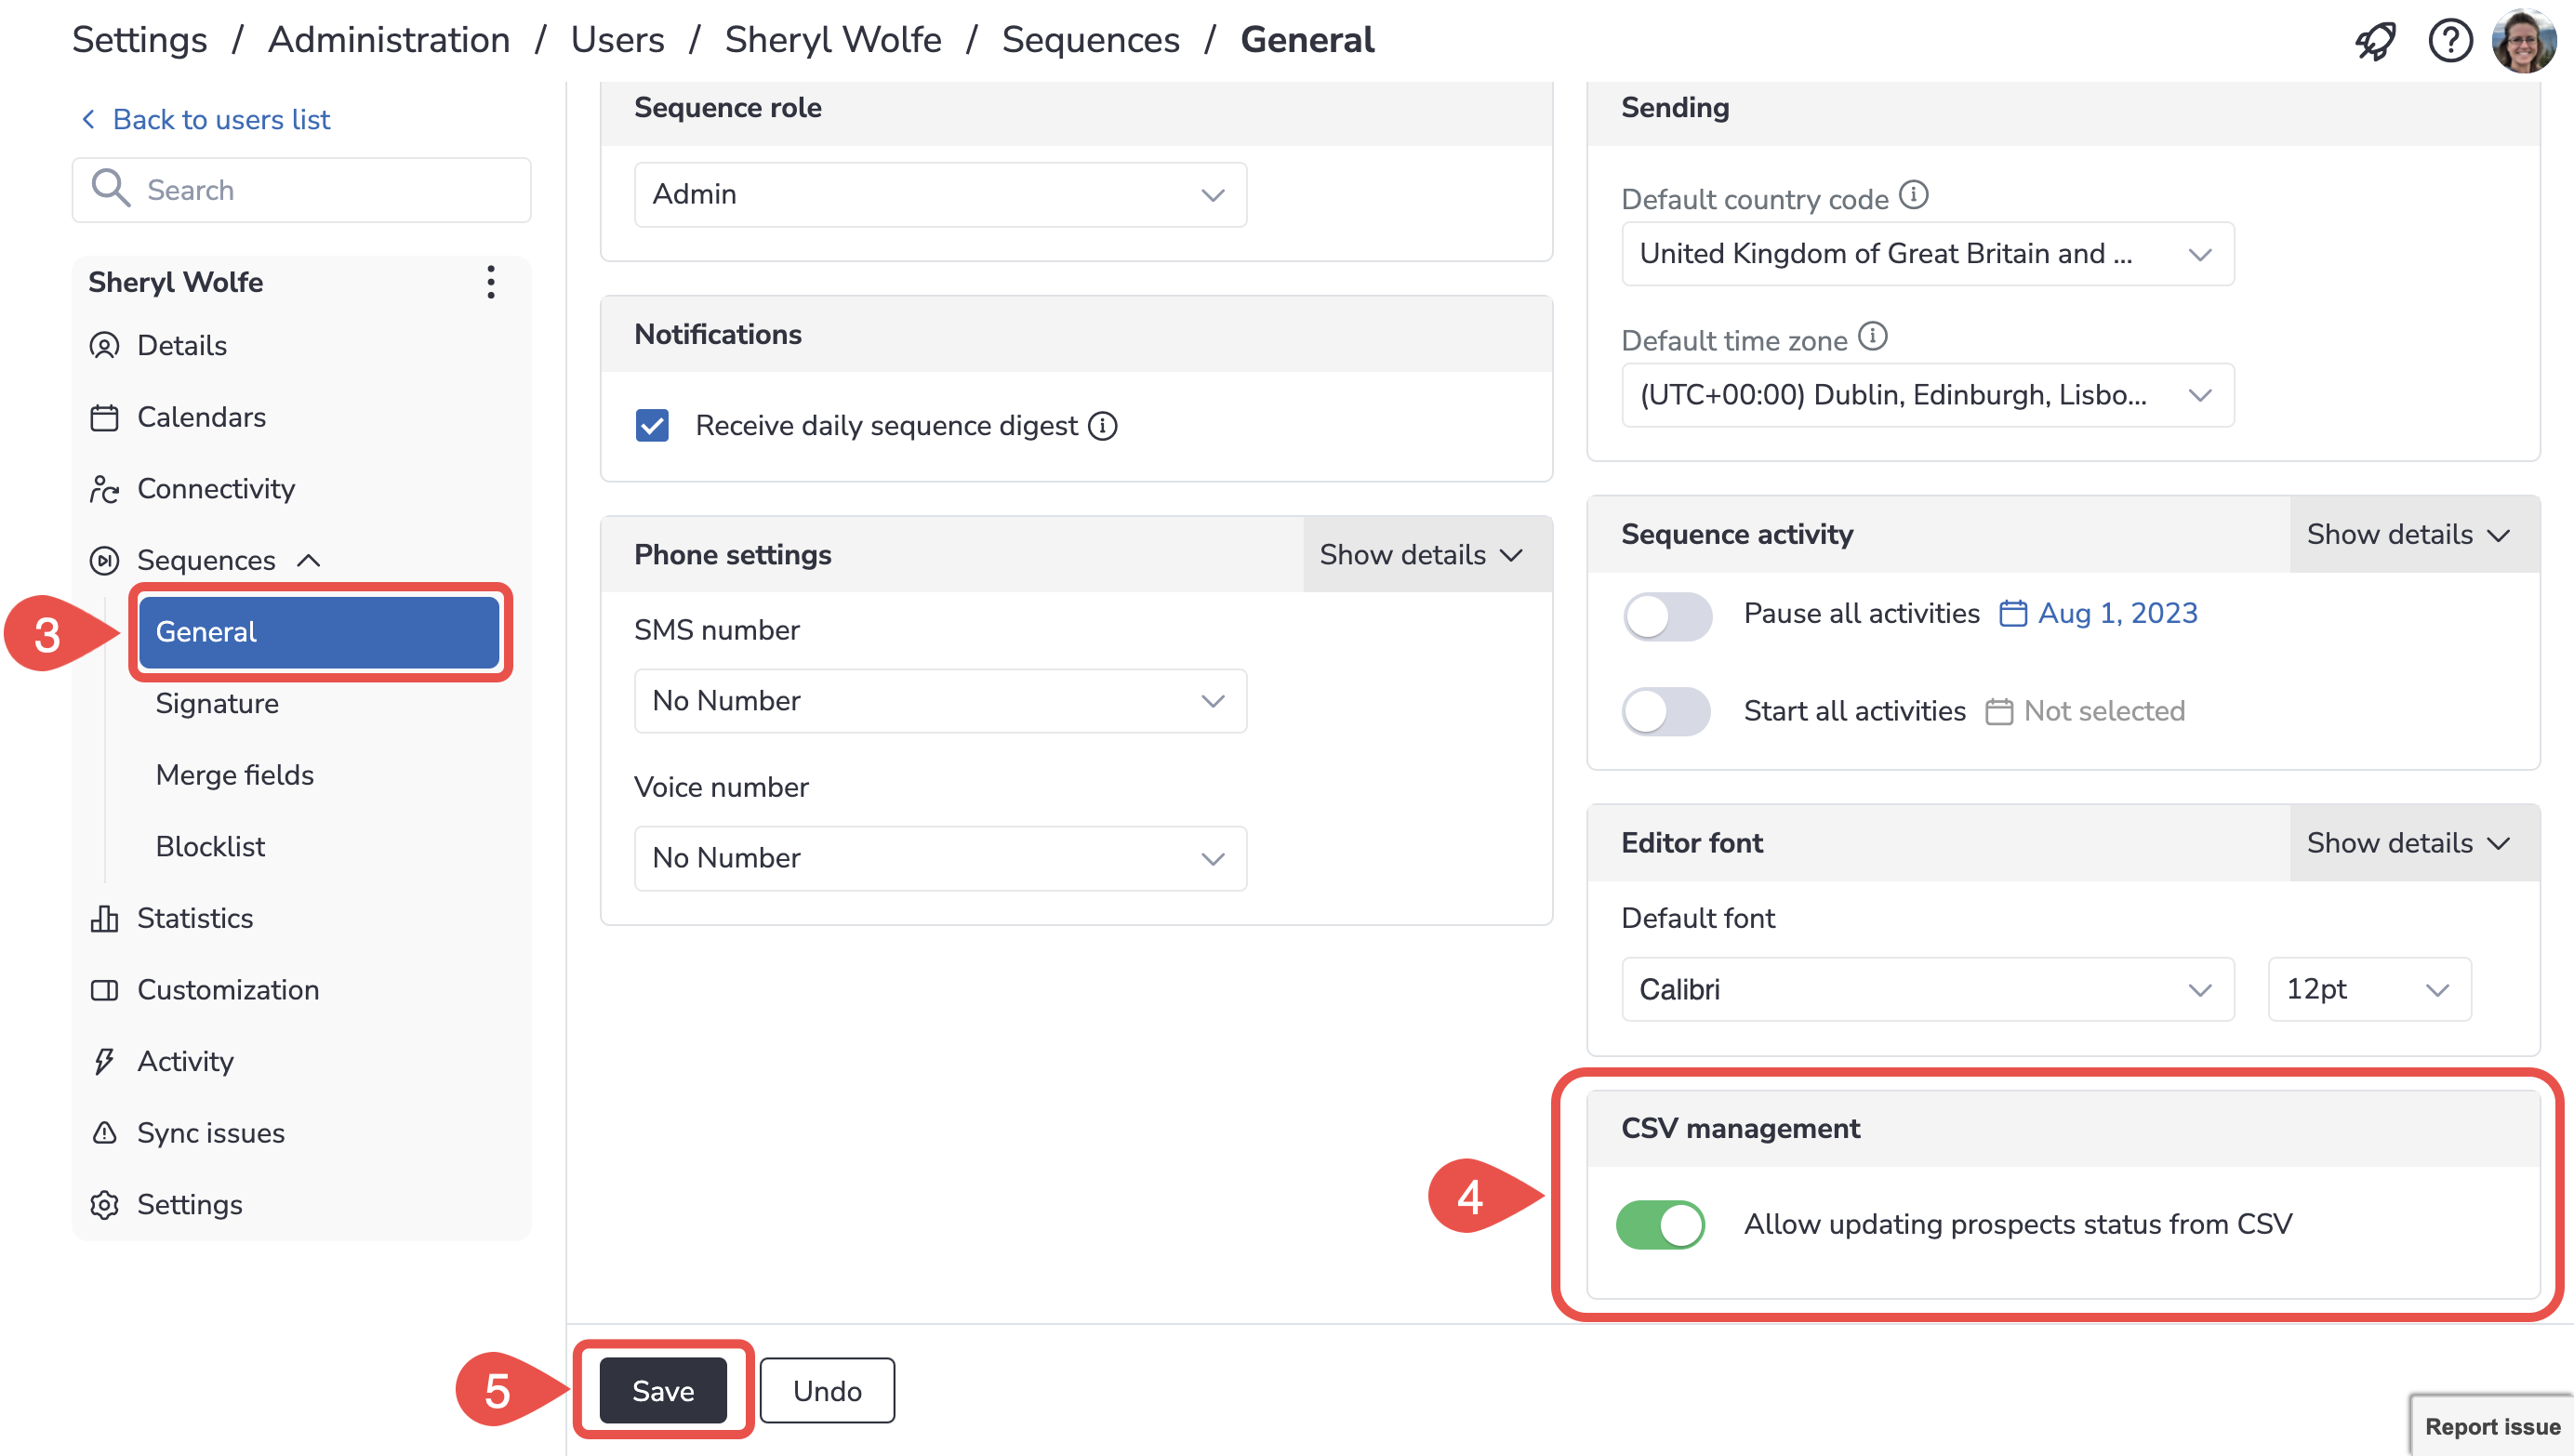
Enable updating prospect status from CSV for users
-
Go to Settings → Administration → Users
-
Click on the necessary user’s name on the list to open their Details
-
Go to Sequences → General
-
Under CSV management, enable the Allow updating prospect status from CSV switch button
-
Click Save
Edit and upload the CSV file
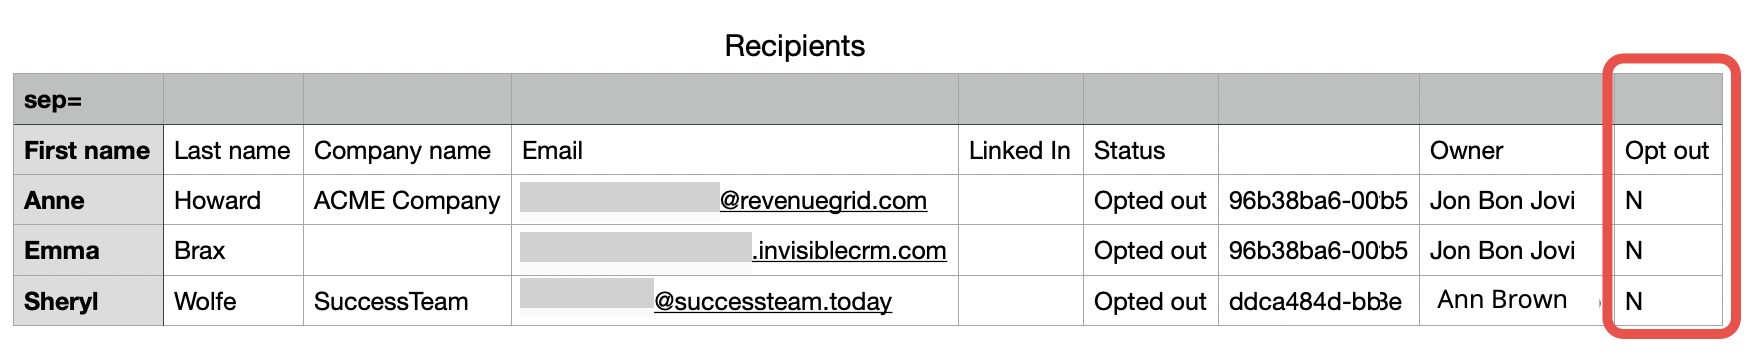
If you need to opt in the prospects whose status is currently opted out on the Audience page:
-
On the Audience page, select “Opted out” in the Filter by box. In this way, you will see only the list of prospects whose status is Opted out.
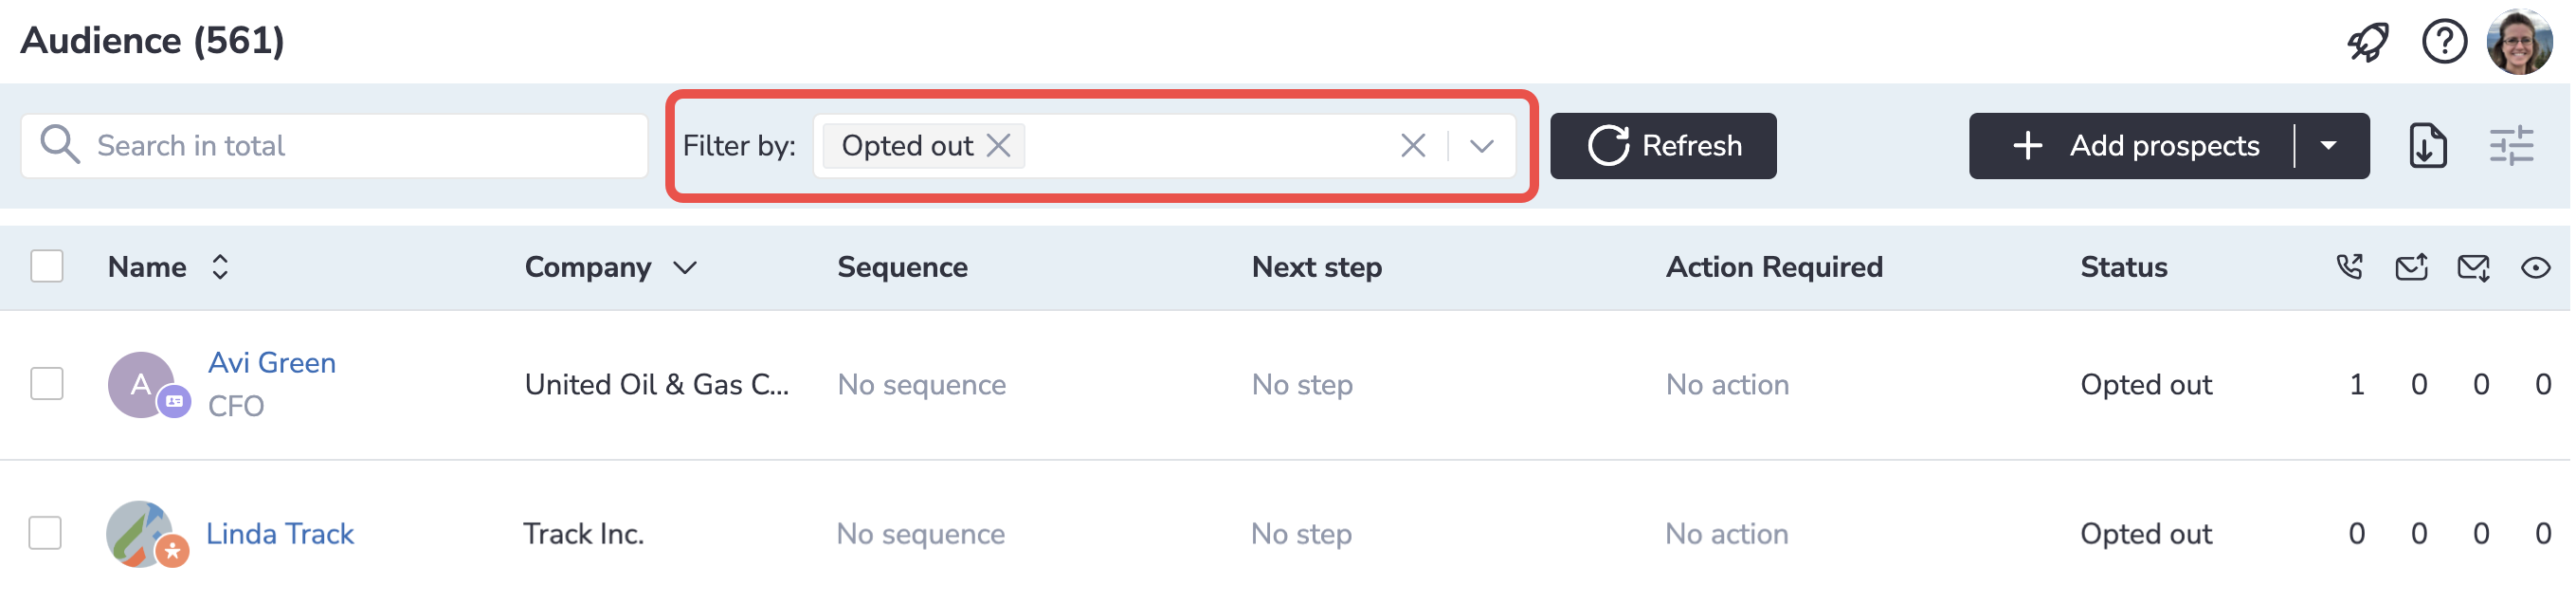
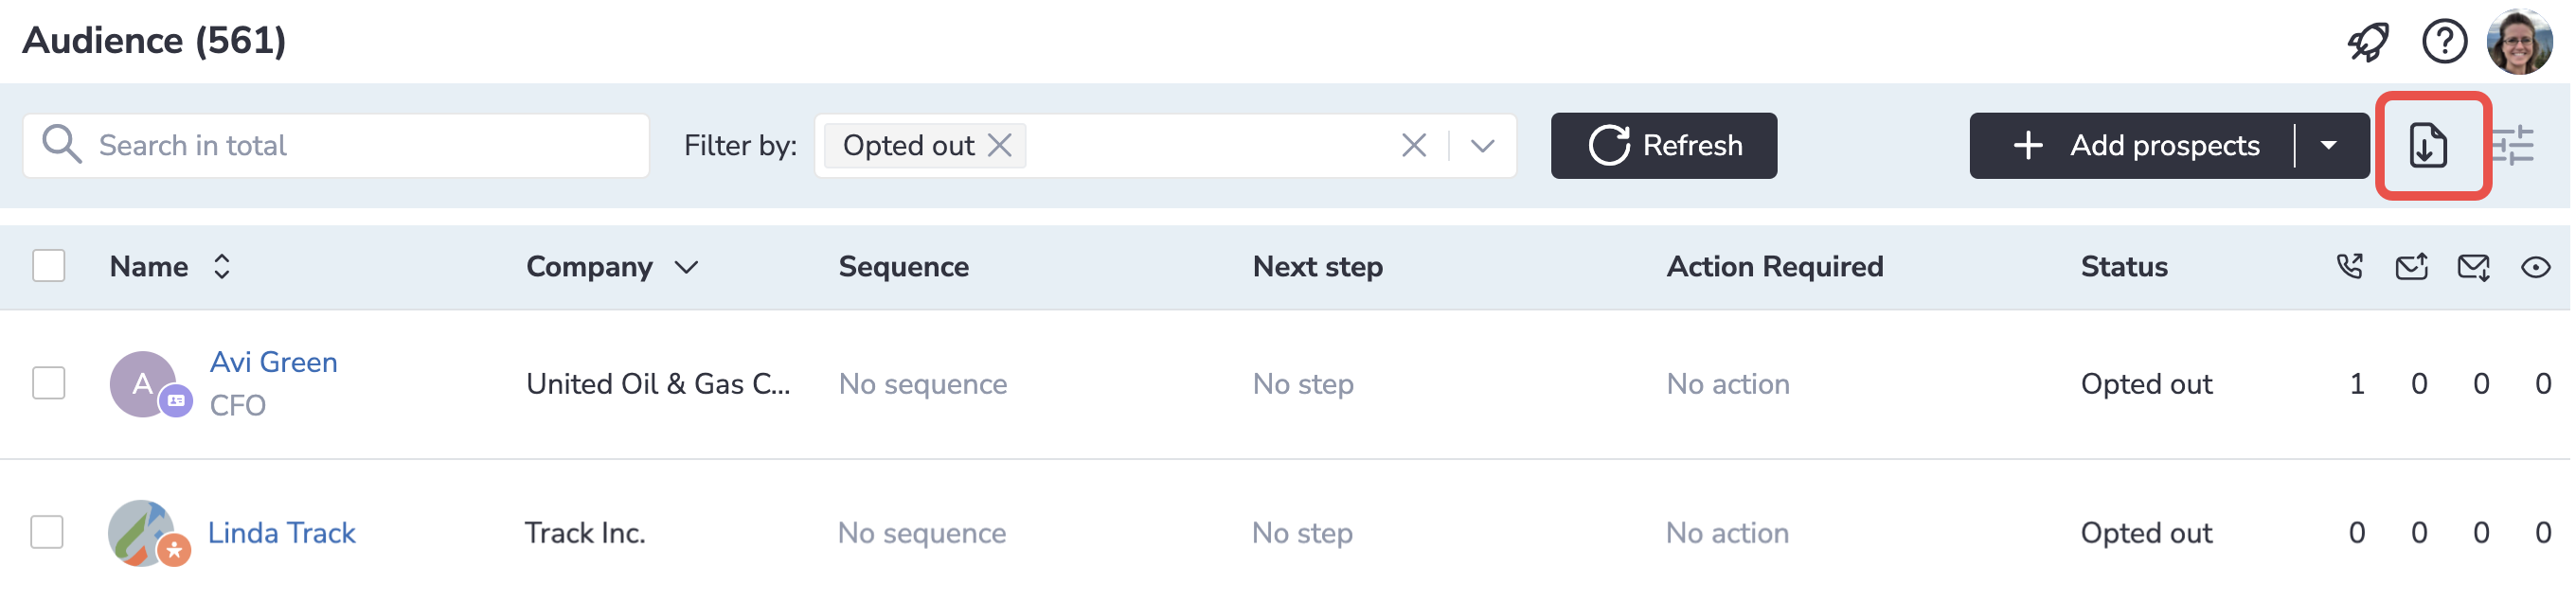
-
Click on the download icon to export the list in the CSV format
-
Open the downloaded file in the preferred editor
-
Add a new column with the name “Opt out“
-
In the newly added column, mark the prospects as necessary:
• N to opt in a prospect
• Y to opt out a prospect
-
Save the CSV file
-
Go to Settings → Platform settings → Sequences → Status update
-
Drag and drop the file into the grey area
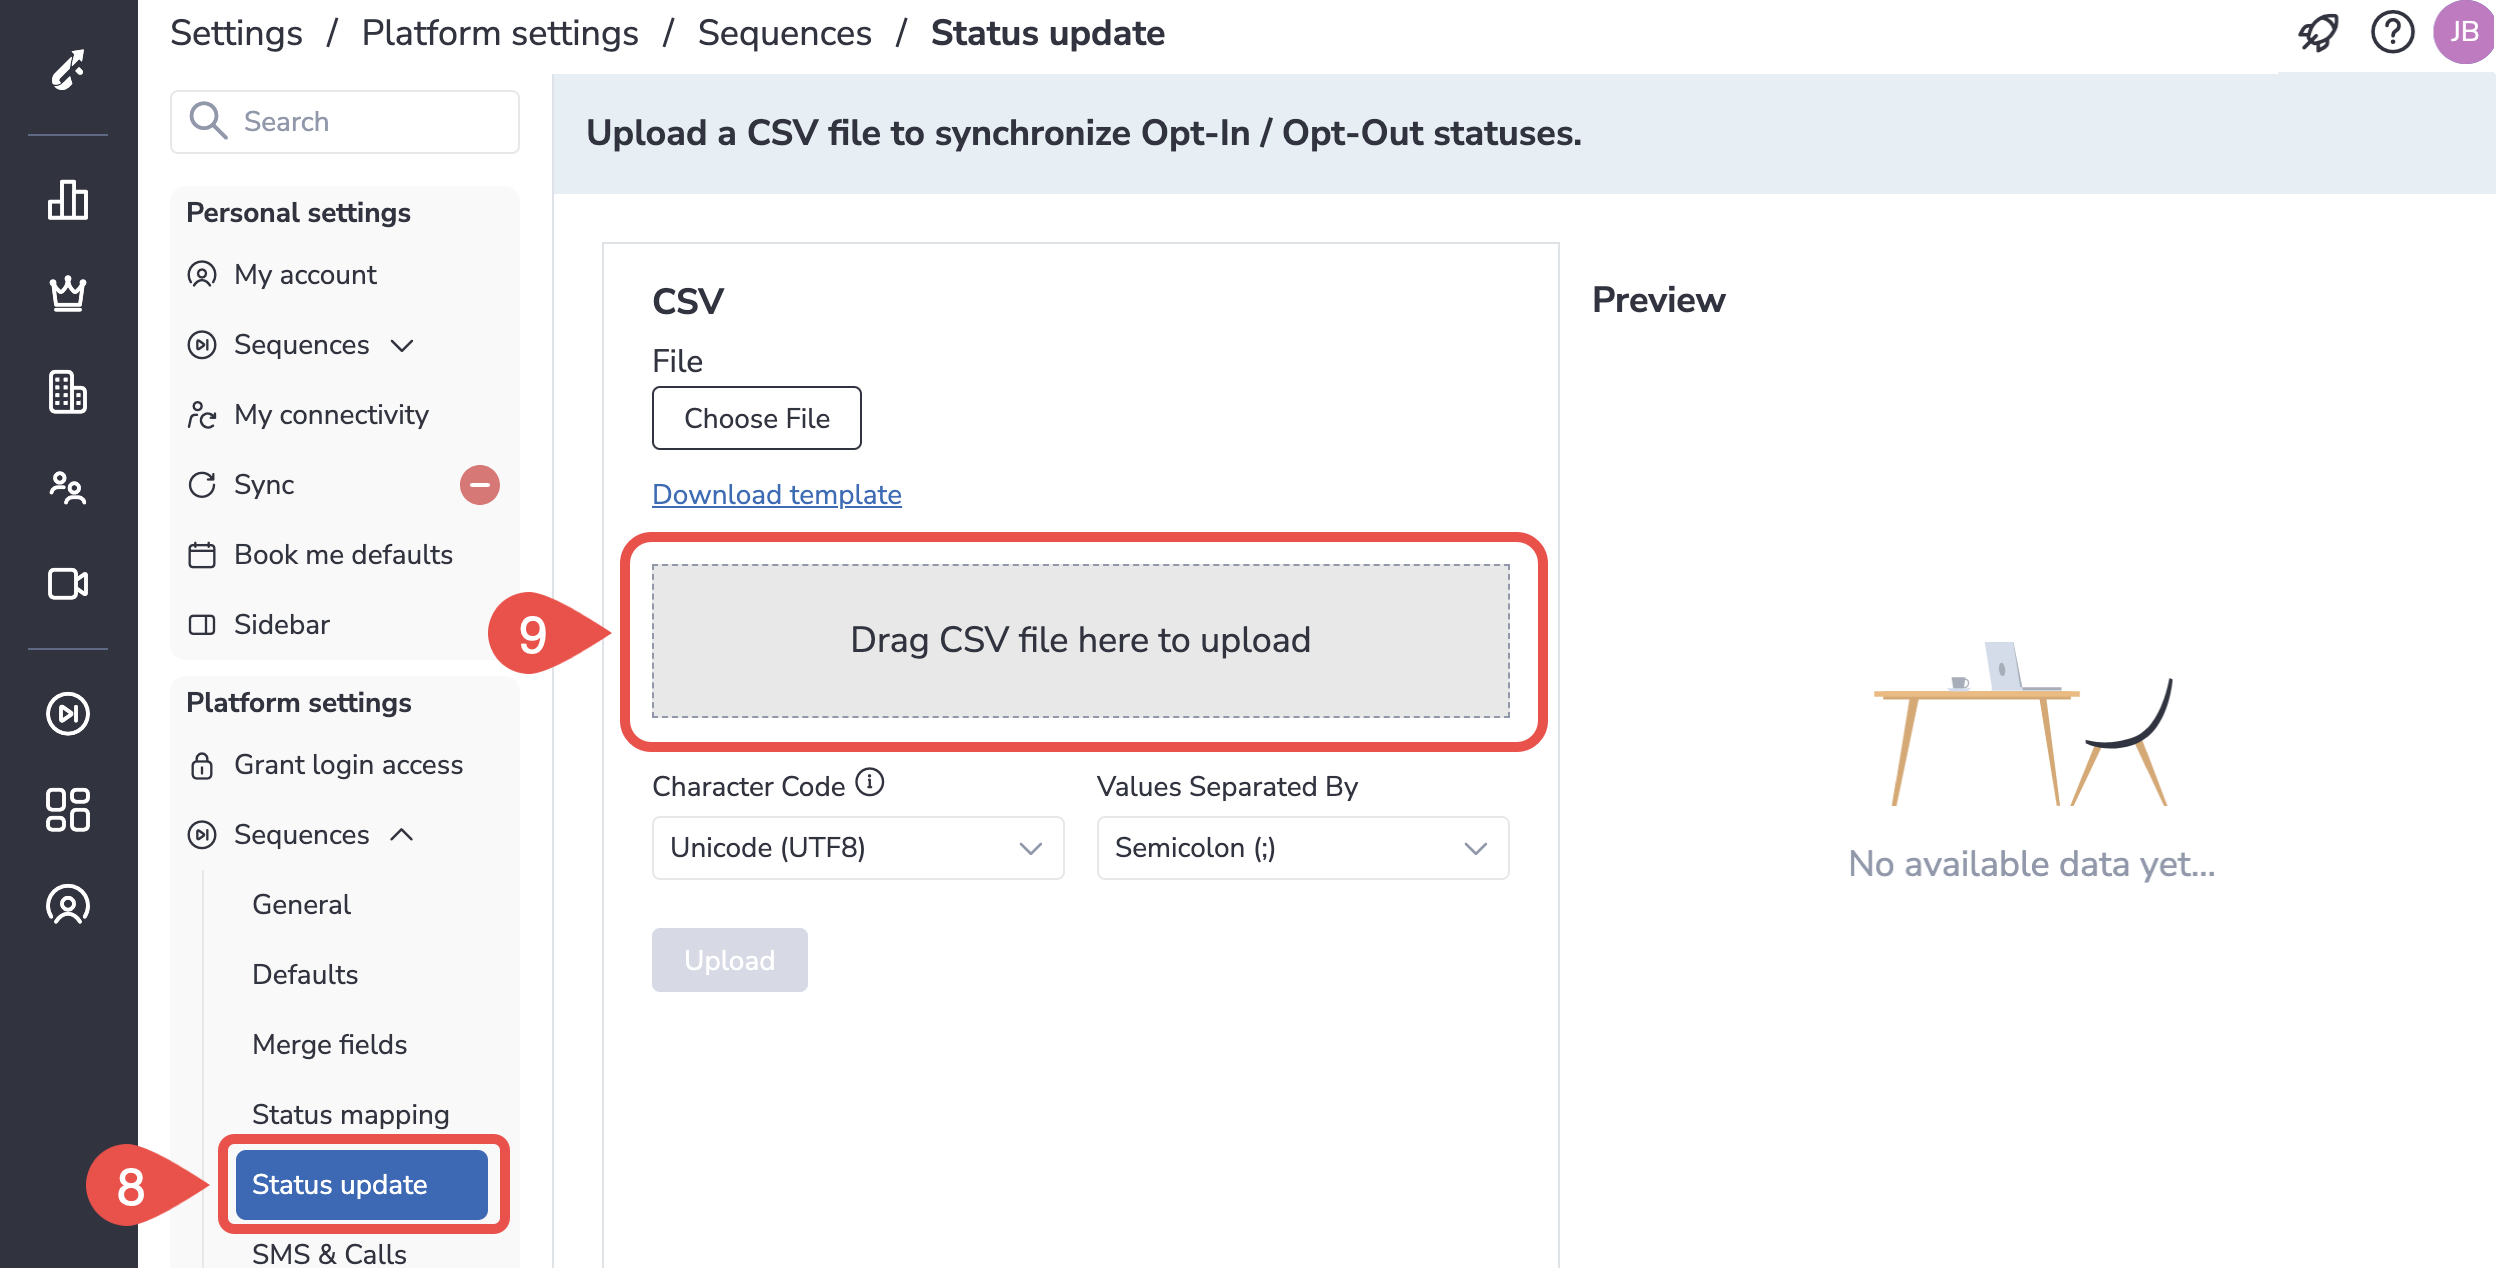
-
If everything is fine, you will see the preview of the file:
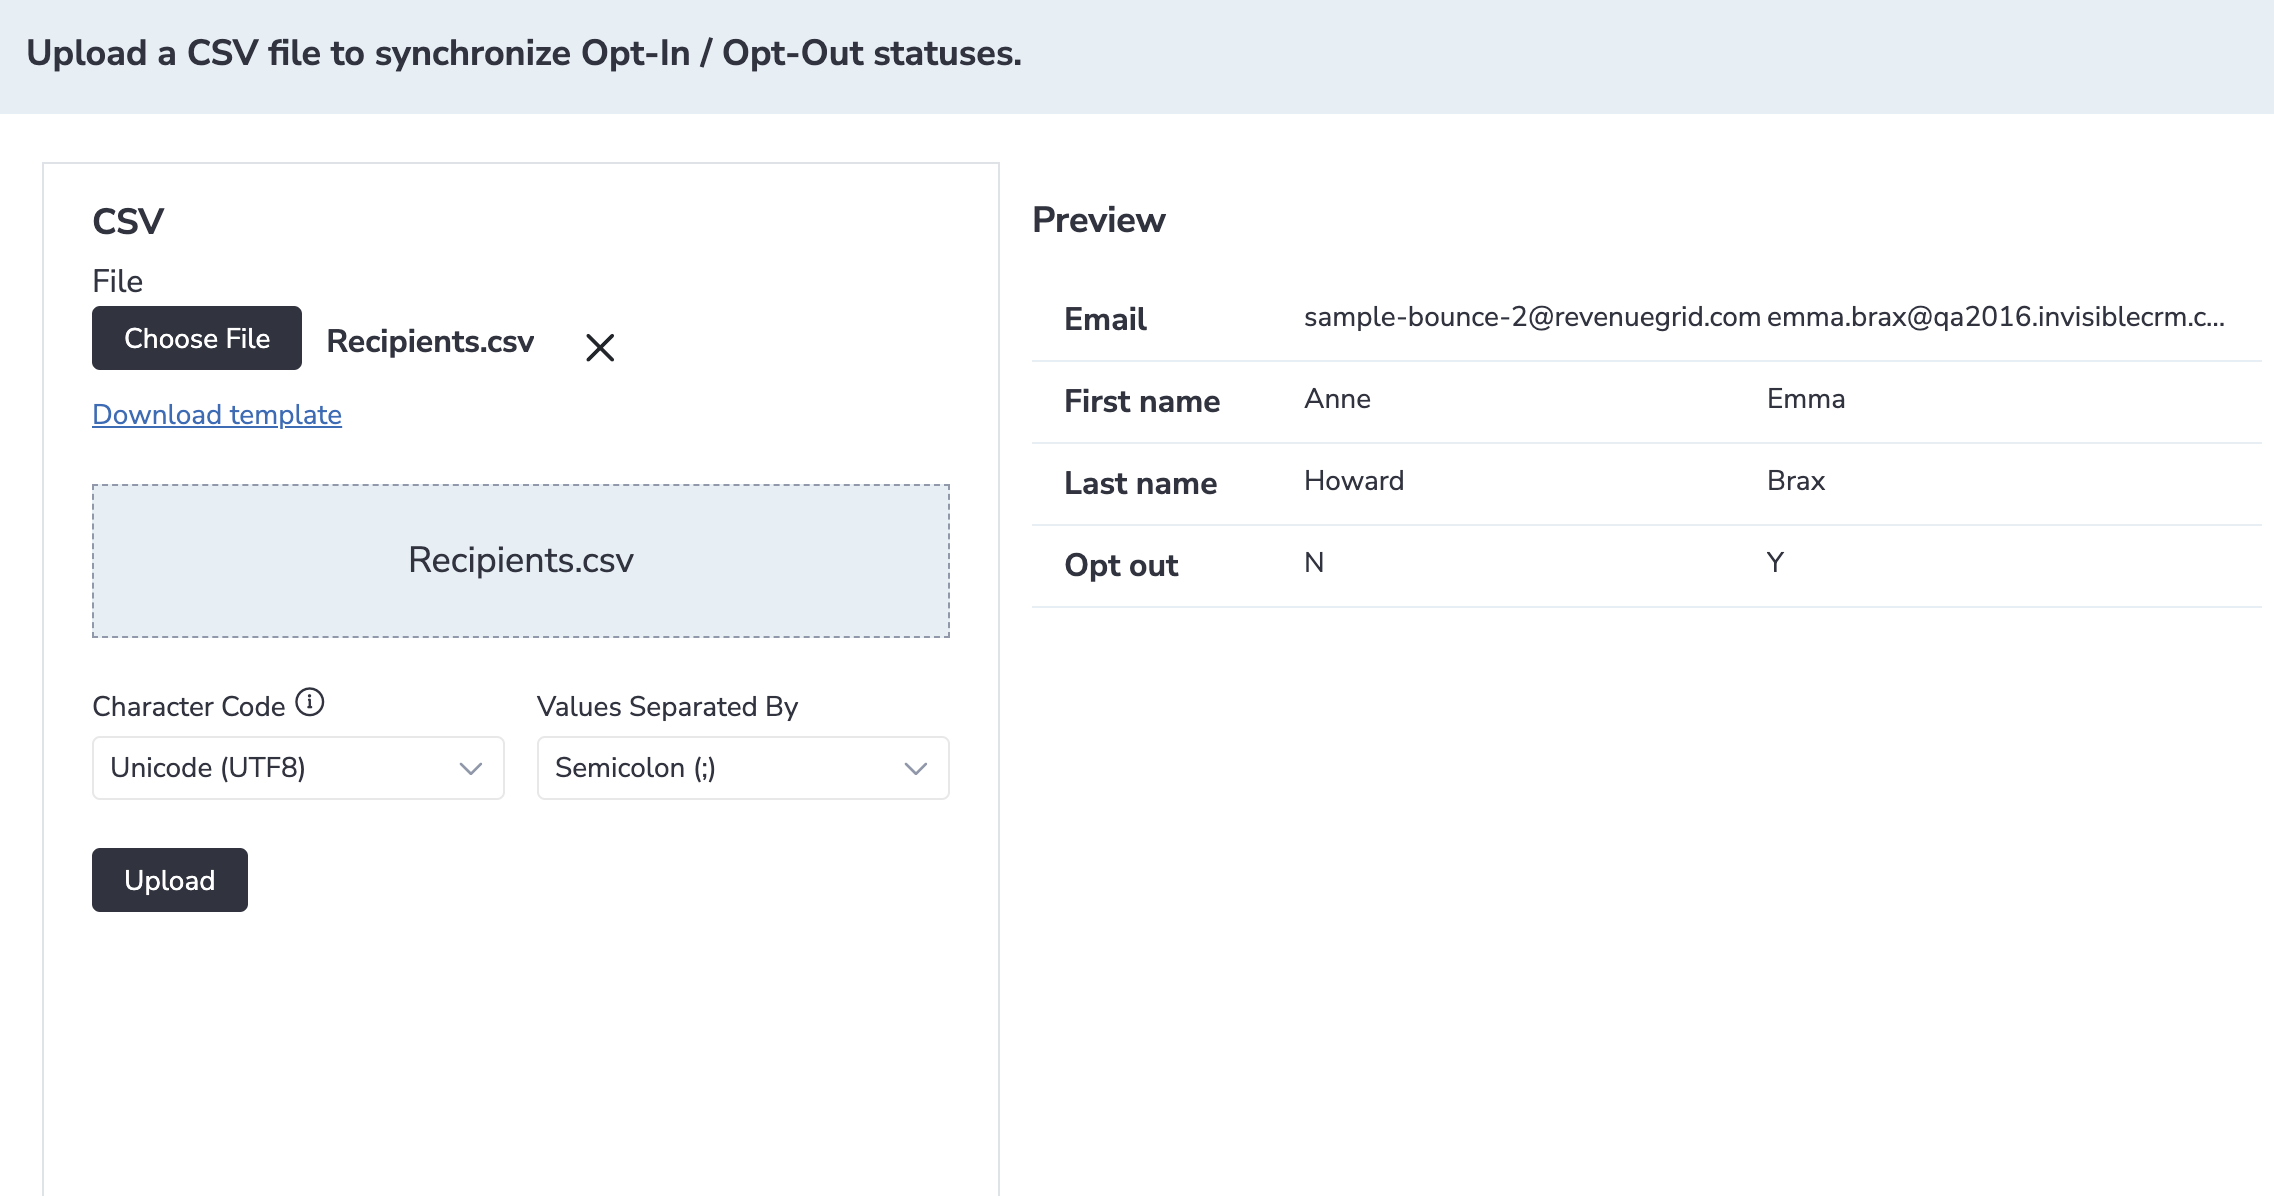
-
Click Upload. As a result, you’ll see a report:
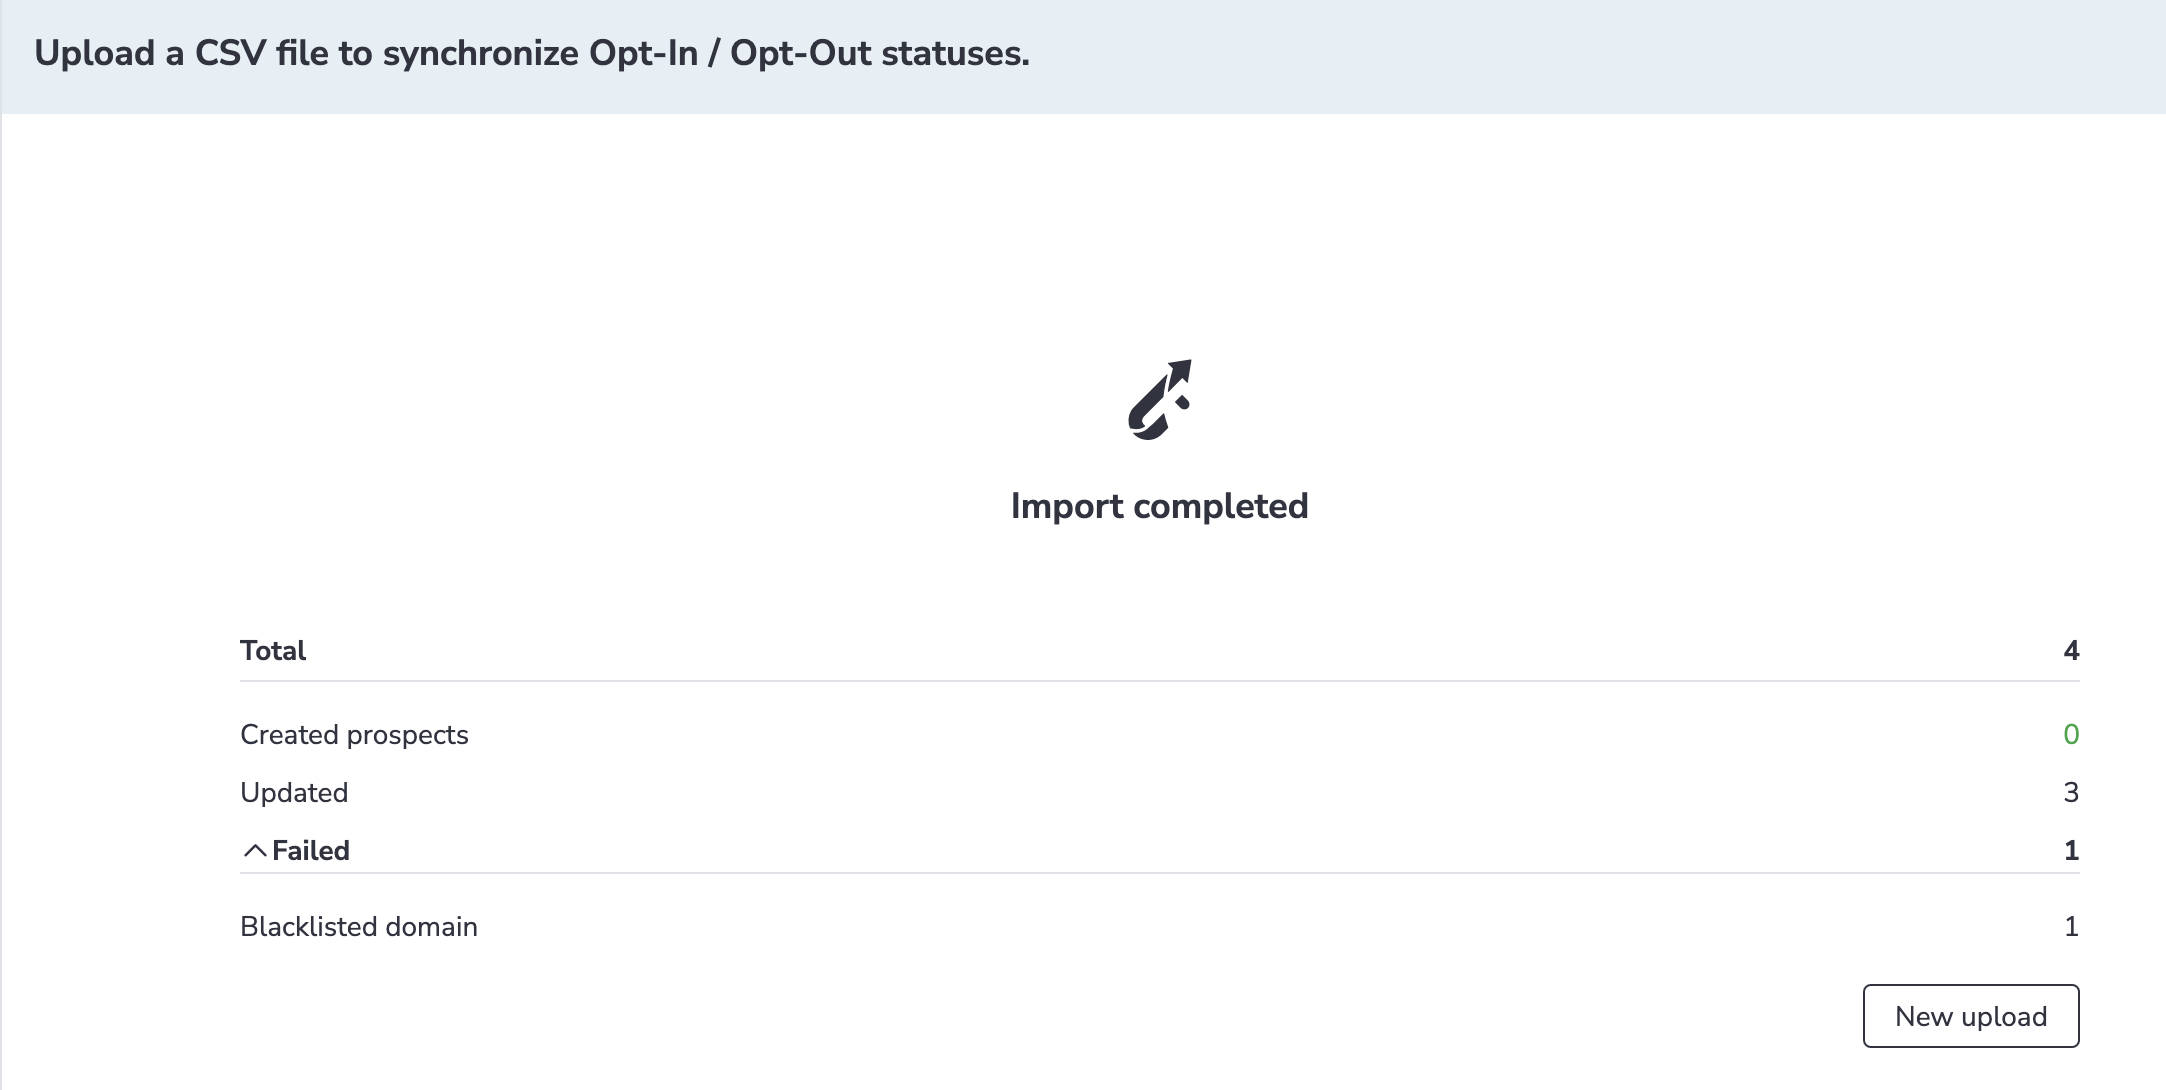
Now, the prospects that had the “Opted out” status in Revenue Grid are with the active status and users can add them to the sequences.
Opt in Salesforce prospects
If prospects’ Salesforce statuses are mapped to Revenue Grid statuses, you can opt in prospects with the Opted out status as described below.
To opt in such a prospect:
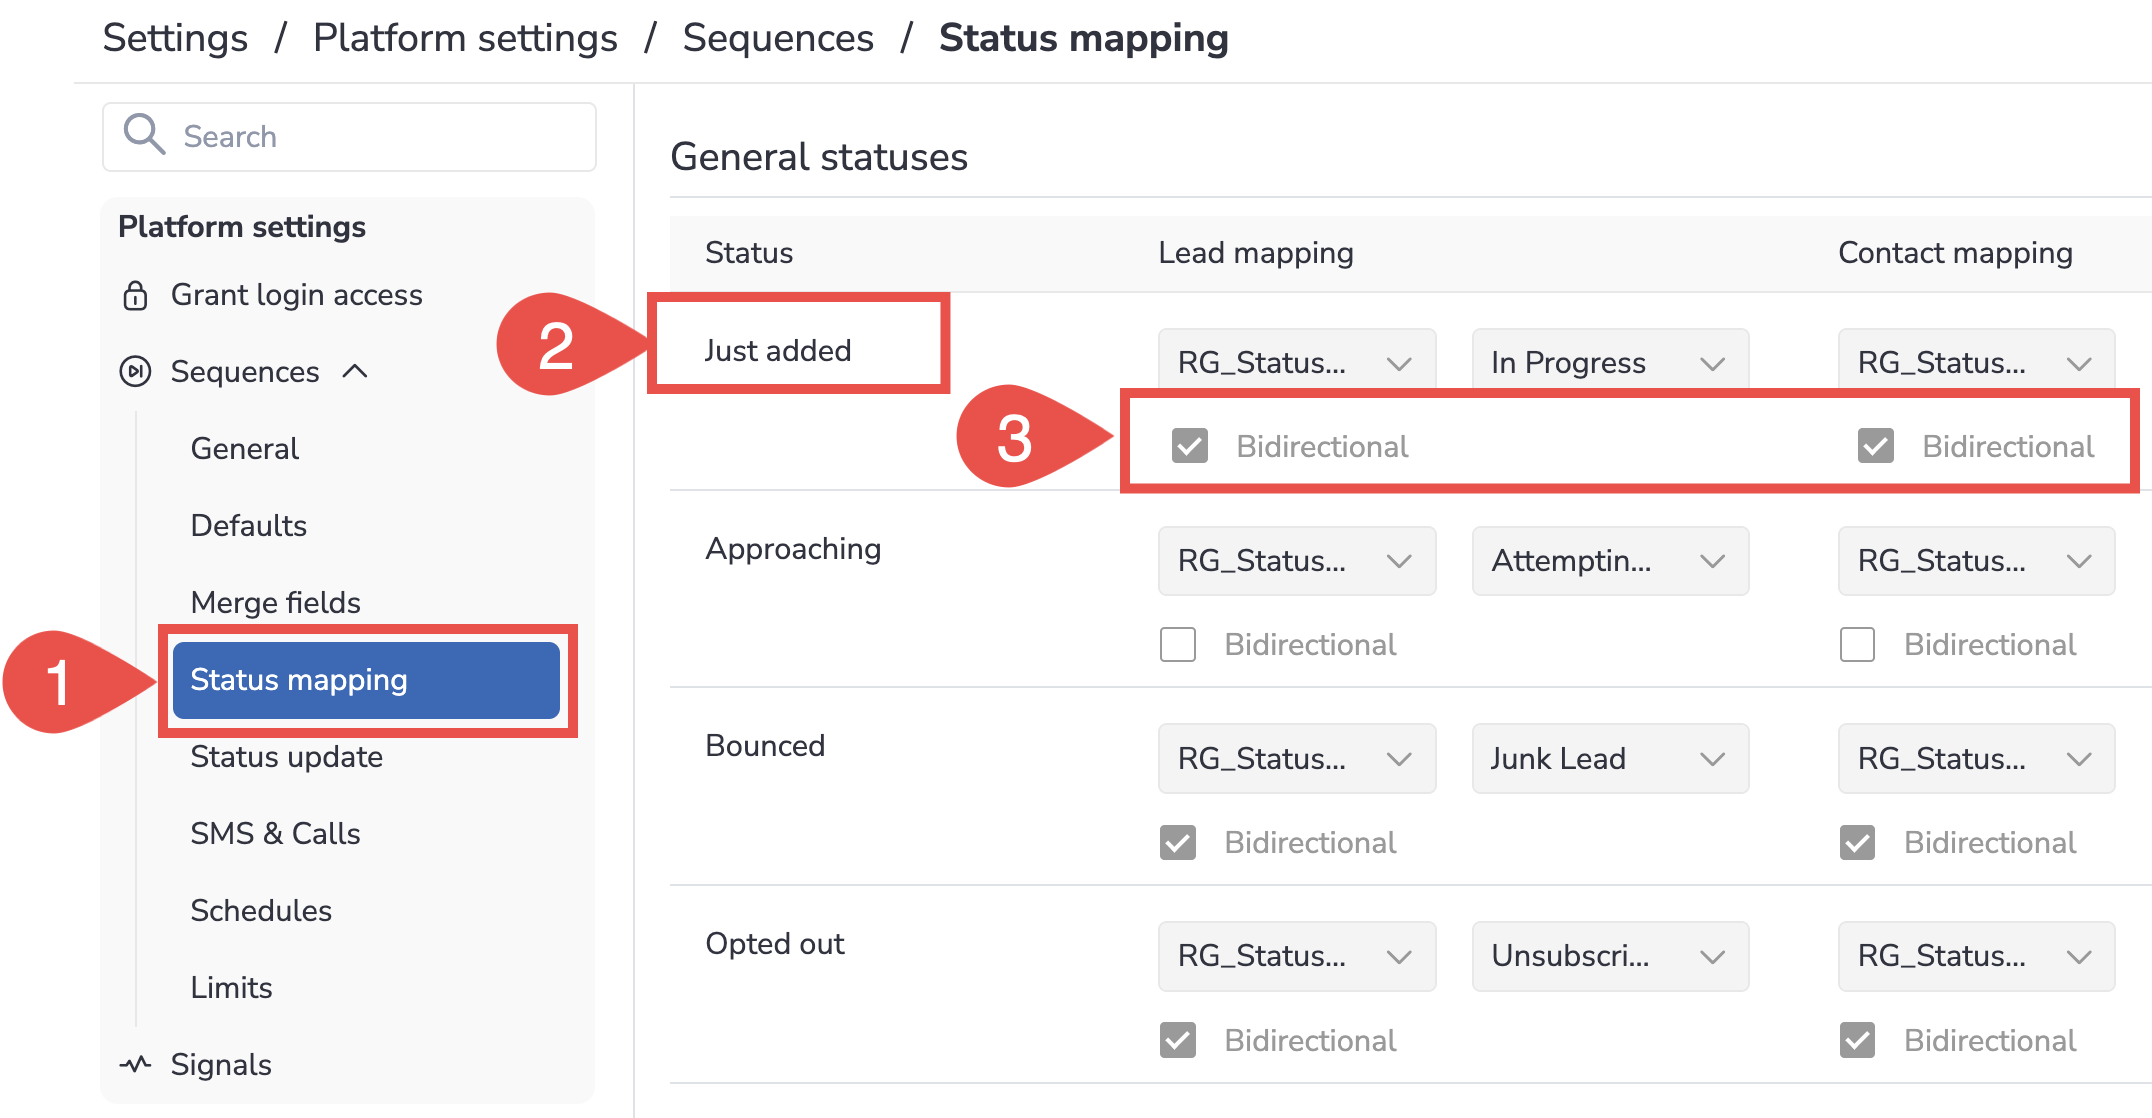
-
Go to Platform settings > Sequences > Status mapping
-
Identify the status with which you want to opt in prospects, e.g., In active Development, Not contacted yet, Just added, etc.
-
Enable the Bidirectional checkbox for the necessary status
The Bidirectional status mapping means that whenever prospect’s status is changed in Salesforce, their status in RG gets changed to the mapped status.
-
Click Save
-
Open Salesforce, find the necessary prospect
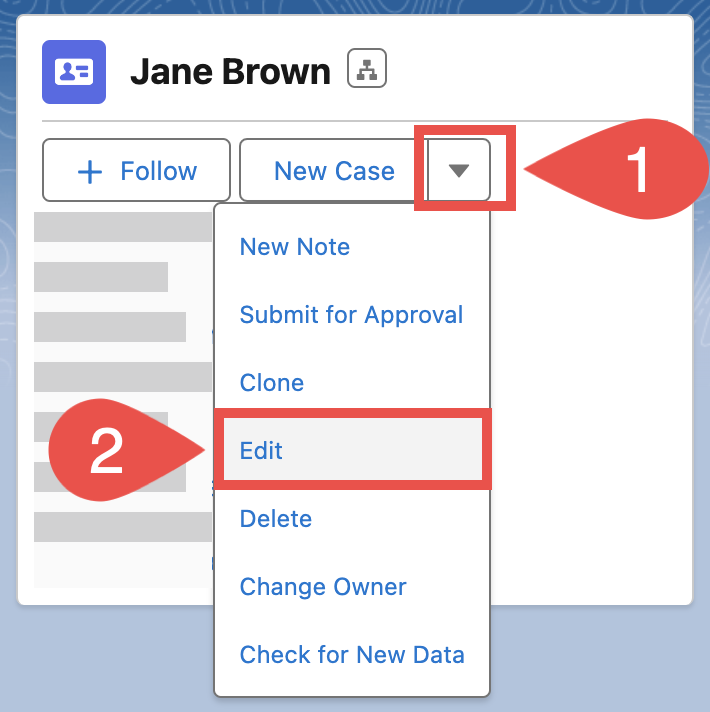
-
Click on the down arrow and select Edit
-
Remove the selection from Email Opt Out checkbox
-
Change the prospect’s status to the initial status that is mapped to the RG status you identified in step 2
-
Save changes
-
Add prospect to sequence. Revenue Grid will automatically update the prospect’s status on adding them to the sequence.
If the prospect is already in an active sequence and you want to restart this sequence for a prospect:
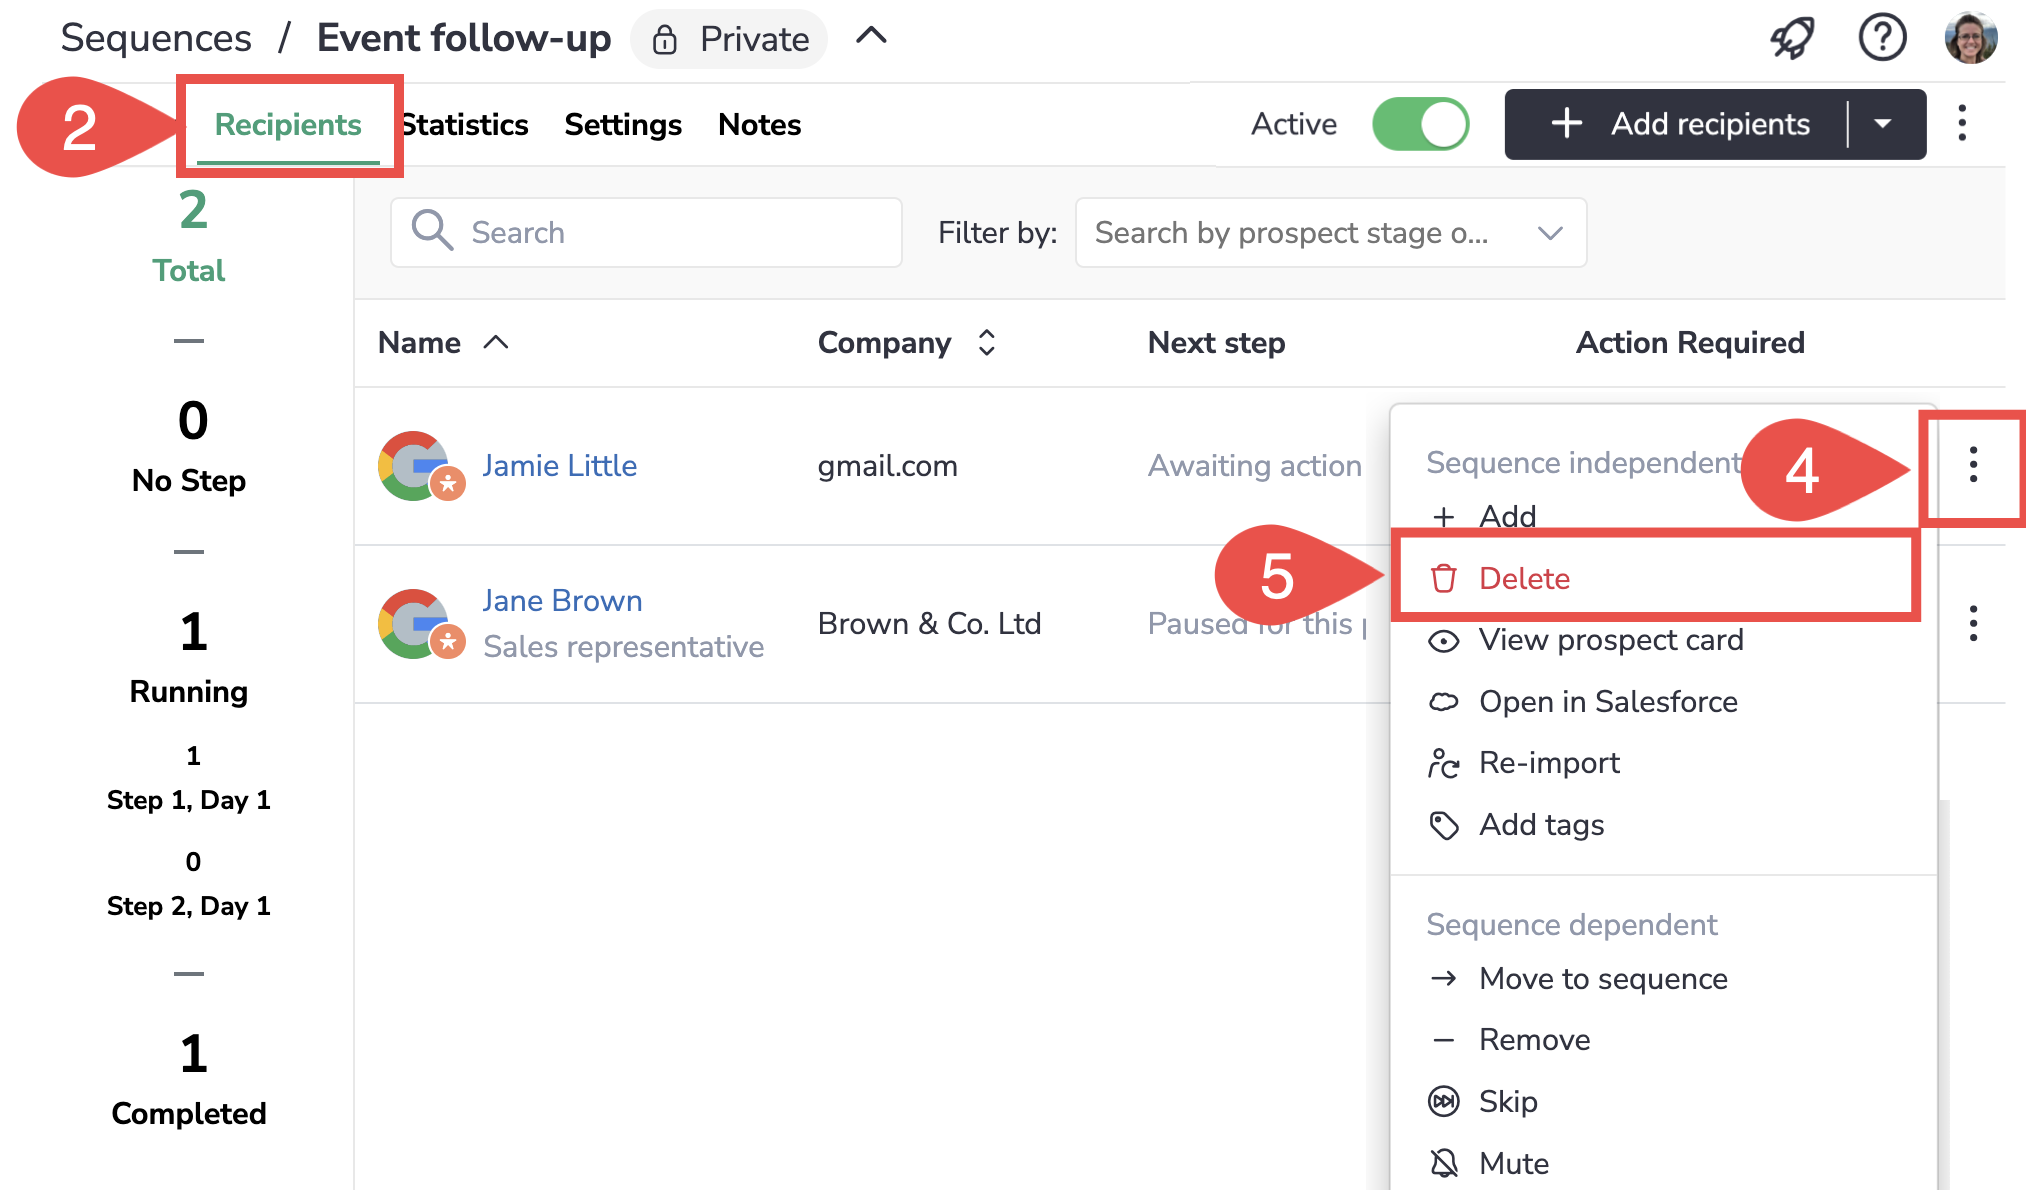
1. Open the necessary Sequence in Revenue Grid
2. Switch to the Recipients tab
3. Find the necessary prospect on the list of recipients
4. Click on three dots menu
5. Select Delete
This action completely erases the prospect from Revenue Grid
If you want to add the prospect you deleted in the previous step to the sequence or add the prospect to a sequence they have never been added to:
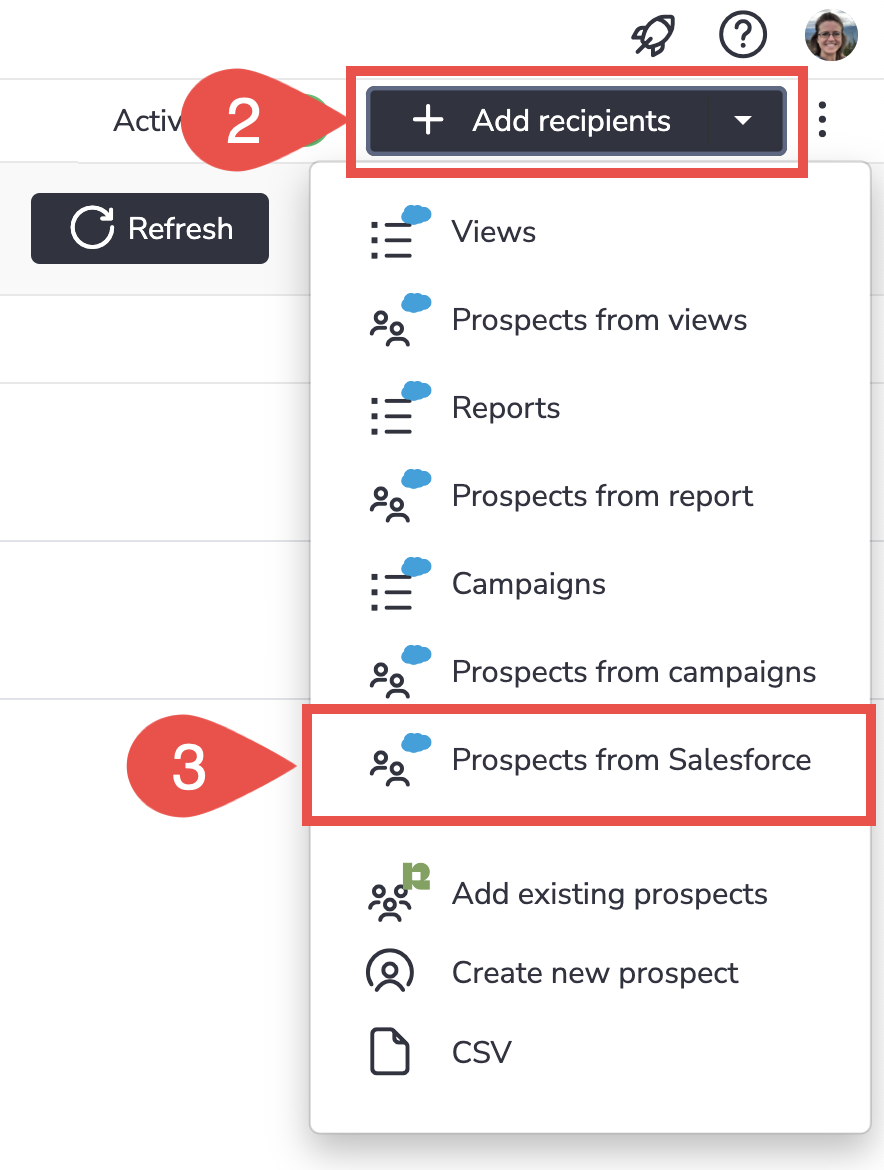
1. Open the necessary Sequence in Revenue Grid
2. Click Add recipients
3. Select Prospects from Salesforce
4. Find the necessary prospect using the search bar
5. Click Add

We would love to hear from you!