Opportunity deep dive
2 min read - updated few hours ago
Click on the Opportunity name to open it and review all related activity. This page contains a comprehensive set of data to help you to leverage sales progress and to understand challenges using the data retrieved from email clients, calendars and Salesforce.
This page is split into four sections:
- Opportunity deep dive
- Review the communication with the Opp
- All involved parties captured and saved
- Engagement highlights
- Revenue Signals to navigate the sales process to closed-win
Review the communication with the Opp
 The Activity trends block displays all communication with the Opportunity as dot plots on a timeline:
- Phone calls
- Meetings
- Inbound emails
- Outbound emails
This block is handy when you need to get more insights into how the Sales Rep has been handling the deal.
Review the timeline to see how consistent communication was and identify any gaps. All changes in Opportunity Close date and Amount are marked on the timeline so that you can analyze the communication prior and identify positive or negative events that contributed to it.
Click on any given plot on the timeline to see the details of communication activity in the pop-up dialog. Here, you can read any given email or see meeting or call details.
All involved parties captured and saved
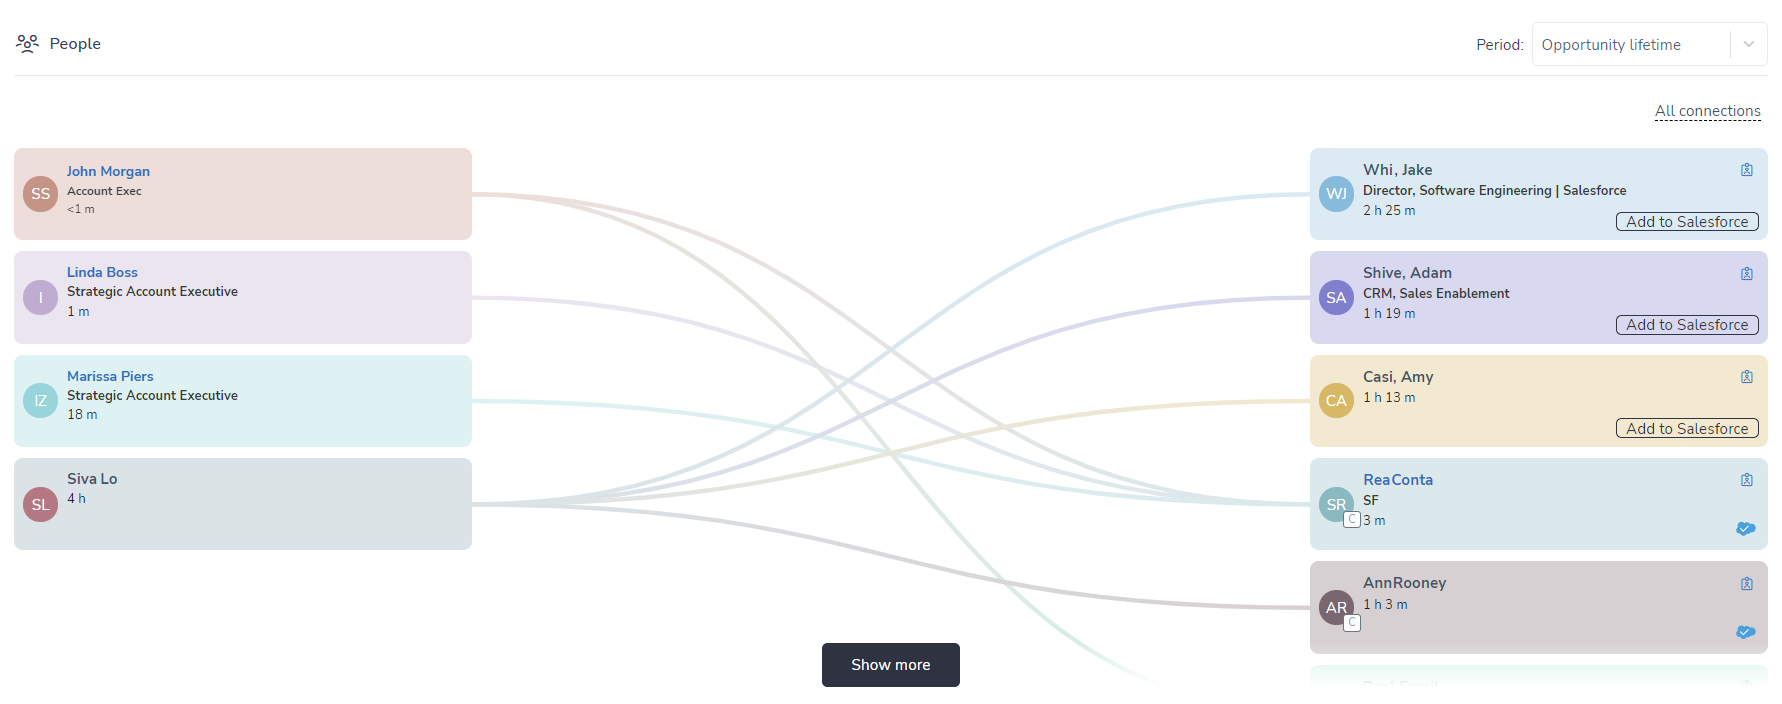 The People block contains an interactive relationship chart. Here, you can see who of your colleagues has been in touch with representatives of Opportunity.
 On this chart, you can view:
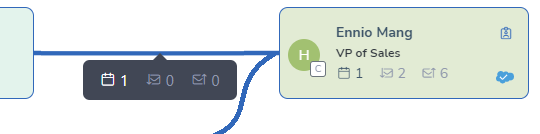
- roles of the people involved
- total recorded communication by type (calls, emails, meetings)
- recorded communication between two particular individuals by hovering over the patch between them
 Contacts who appear on the customers’ side of the chart (the right-hand side), have additional elements:
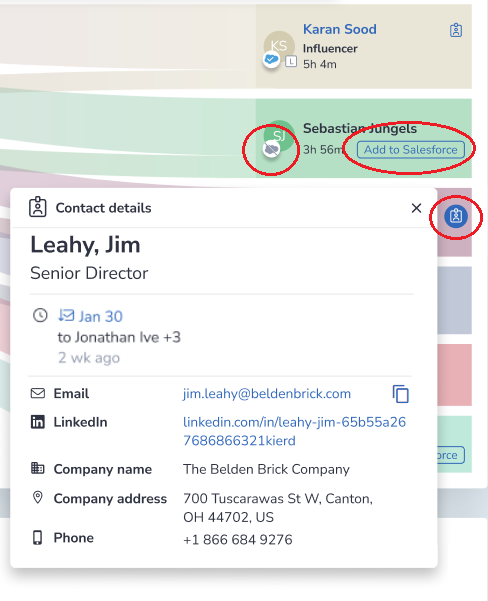
- Salesforce icon to identify whether a contact is saved in Salesforce. If not, use the Add to Salesforce button to create a contact in Salesforce and link it with the Opportunity..
- Contact icon. When you click on this icon, you will see a pop-up window with Contact details. It’s prefilled with the data parsed from emails received the Contact and information stored in Salesforce, or supplementary data found via the  Bing search engine.
Engagement highlights
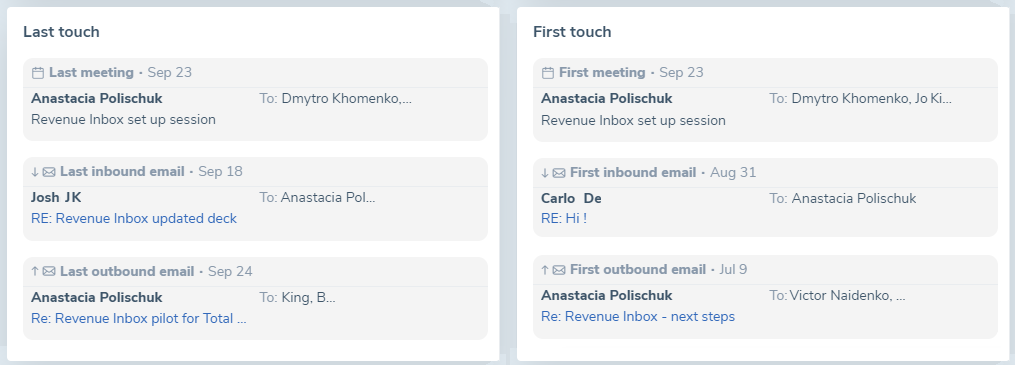 In the Engagement highlights block, you can grasp quickly what was the most recent meeting, inbound and outbound emails with representatives of an Opportunity.
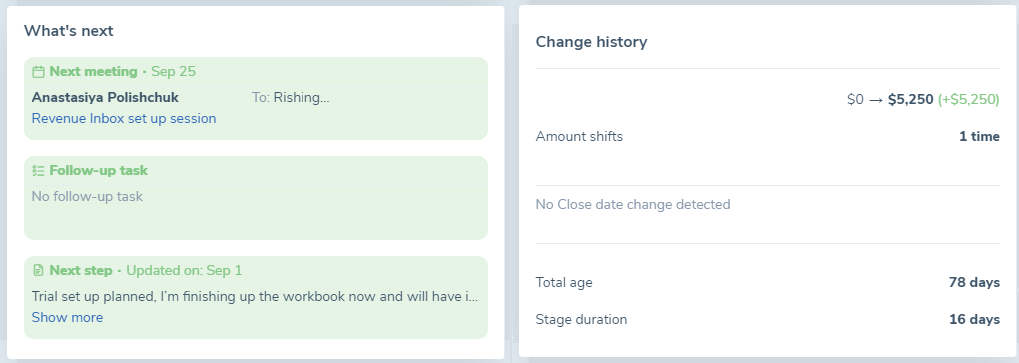 What’s next is automatically retrieved from Salesforce if the corresponding field is filled in.
Revenue Grid also analyses the Sales Representatives’ calendars to identify any future scheduled meetings with their Opportunities and fills in the next step with any future events.
Sales Reps can add the Next step right in the Opportunity table. It will be automatically synced to Salesforce.
Change history reflects the changes made to an Opportunity and their number. For example, Close date shifts, Amount changes, Opportunity age.
Revenue Signals to navigate the sales process to closed-win
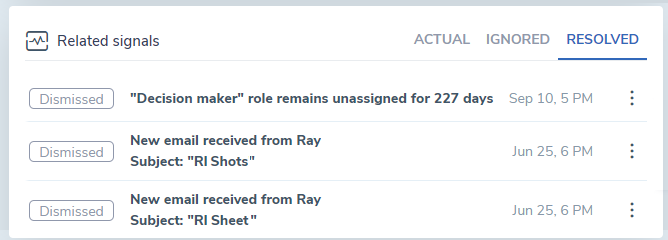
In this block, you can review what signals and action items were ever created for this Opportunity.
For example, if you created an action item for the Sales Rep who handles this Opportunity, you can see whether and when the signal was resolved. In this way, you can make sure that your team does exactly what you need them to do.
You can also create positive and negative signals, and action items on this page.
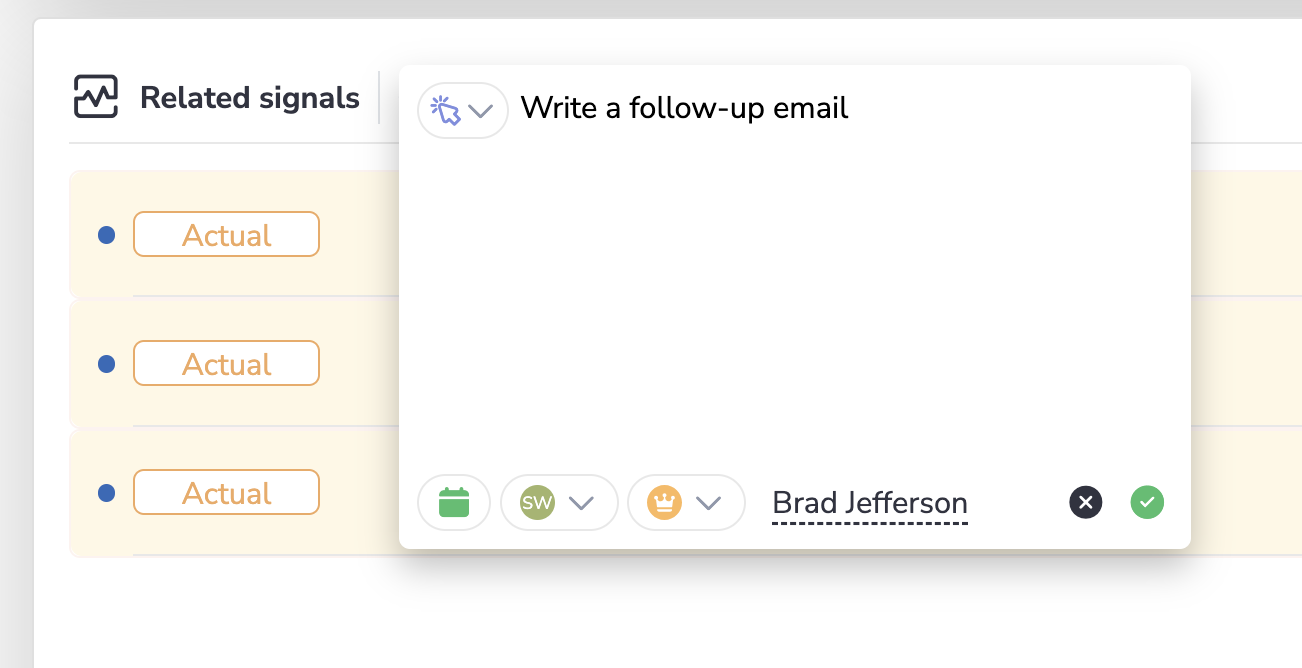
To create a signal or action item:
- Click on the plus icon
- Select the type of item you want to create:
• Positive signal (+ 3 to Opp’s score). This signal means a push forward towards winning a deal.
• Negative signal (-16 from Opp’s score). This signal means a bad impact on winning a deal.
• Action item. It does not affect the score of the Opportunity. It’s used to assign Opportunity related tasks to your team.
- Enter the text you want the Sales Rep to see
- Click on the calendar icon to add Notification date
- Click the green check icon to save the signal
For more information about Revenue Signals, refer to this article.

We would love to hear from you!