Install and Run Email Sidebar for Office 365 Mailboxes
For users of the Email Sidebar on:

5 min read
Tip
For a description of all available installation and logon (Sandbox, Customer / Partner Community) options, please refer to this article
Note
If you are a local administrator rolling out RG Email Sidebar for multiple users in your org, you can make use of Add-In mass deployment mechanisms
I. Install RG Email Sidebar Add-In
You can install Revenue Grid Email Sidebar Add-in in your MS Exchange / Office 365 mailbox using one of the following ways:
Install the Add-in via Outlook on the desktop
Tip
Also, refer to this Microsoft article describing add-ins installation via Outlook on the desktop
1. Go to the Add-Ins management dialog in Office 365 Outlook by opening this O365 URL directly in your browser: https://outlook.office.com/mail/inclientstore
2. If needed, log in with your mail account via the standard Office 365 Sign in dialog
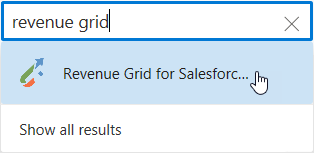
3. In the opened Add-Ins for Outlook dialog, type "Revenue Grid" in the Search box in the upper right-hand side of the dialog and select Revenue Grid for Salesforce
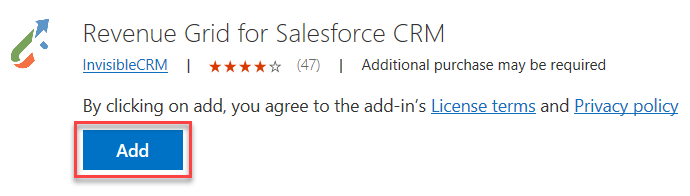
4. In the next dialog, click Add
You will see RG Email Sidebar icons added to MS Outlook ribbon.
After you install the Add-in for an email account, it becomes available in MS Outlook running on other configurations and devices compatible with Outlook on the Web, Outlook for Mac, iOS, or Android with the same account logged in.
Next, you need to log in to RG Email Sidebar.
Alternatively, follow the steps below describing the Add-in installation via Revenue Grid website.
Install the Add-In via Revenue Grid website
Another way to install the Add-In for Office 365 mailboxes is to use a dedicated Getting Started page on the Revenue Grid website.
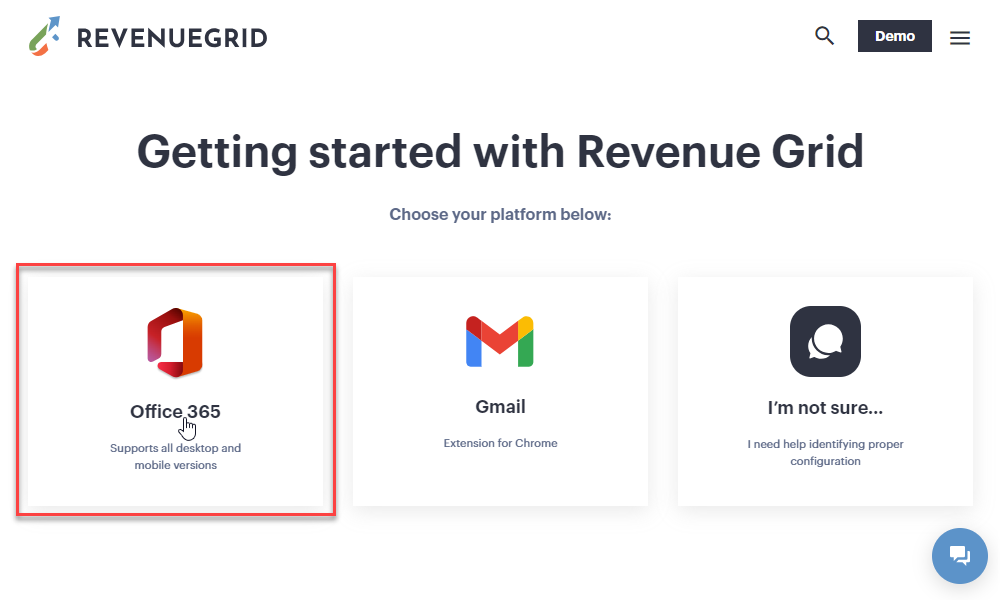
1. Open the Getting Started page in your web browser using this link
2. Next, select the Office 365 option
3. You will be directed to RG Email Sidebar Add-In's page in Microsoft AppSource.
On this page, click Get it now

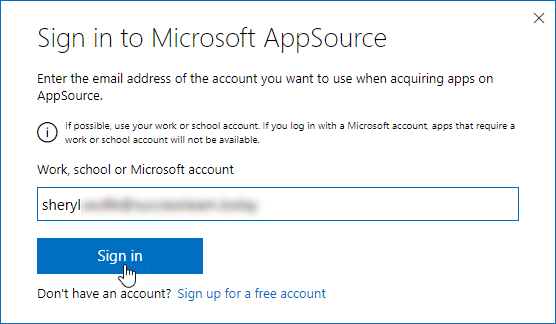
4. Enter email address of the Office 365 account you want to install the Add-In for and click Sign in
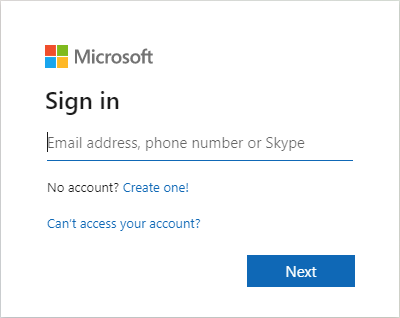
5. Enter your Office 365 login credentials in the O365 OAuth 2.0 dialog or pick an account from the list when available
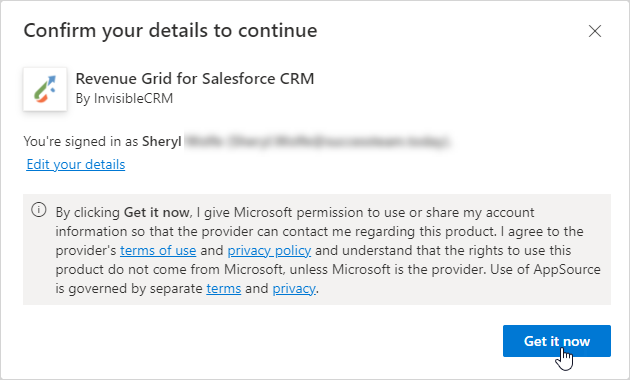
6. In the next dialog, click Get it now to confirm your details and continue
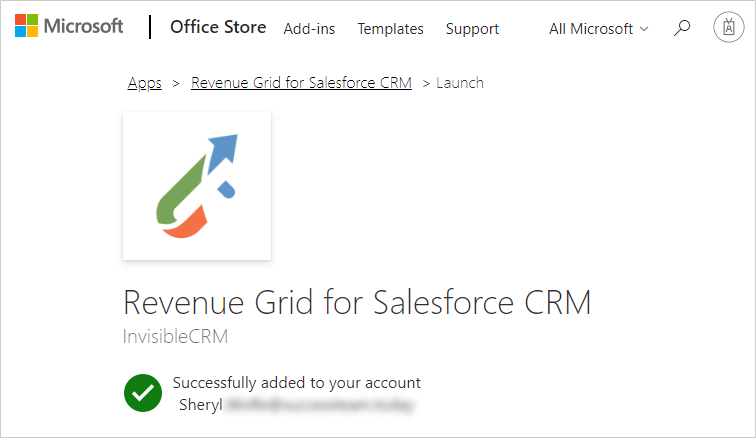
Now the Add-In is successfully added to your Office 365 account.
Note
After you install the Add-in for an email account, it becomes available in MS Outlook running on other configurations and devices compatible with Outlook on the Web, Outlook for Mac, iOS, or Android with the same account logged in
Important
Before using RG Email Sidebar in MS Outlook Desktop on Windows, please make sure that you have the latest version of MS Edge installed, since it is used to render RG Email Sidebar in MS Outlook
II. RG Email Sidebar logon
Note
RGES logging in is not instant: depending on the number of email messages in your mailbox and items in your calendar it may take several minutes to log in, since on logging in RGES needs to match all your existing correspondence and calendar items with your Salesforce records. That is only performed once per account
Open the Sidebar
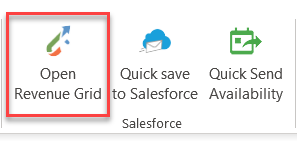
1. Select, open, or start composing a new email message in Outlook
2. Click Open Revenue Grid in the ribbon to open the Sidebar
See this article to learn how to open the Sidebar in MS Outlook on the Web.
Log in to RG Email Sidebar
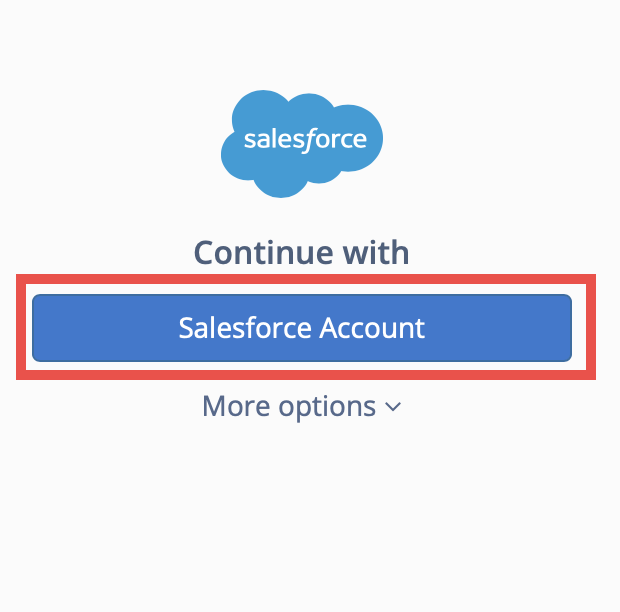
3. Click Salesforce Account. A browser window with Salesforce OAuth page will be opened
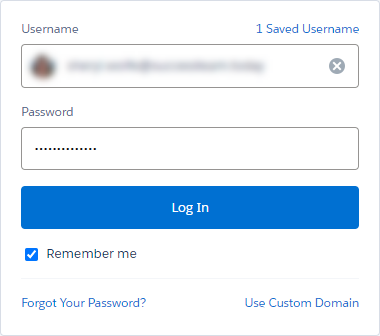
4. Enter your Salesforce credentials on the page or select a previously saved account’s username and click Log In
Note
In the screenshot above, a standard Salesforce login window is shown. Note that this OAuth window may look different depending on your Salesforce configuration

5. Next, click Allow to grant Revenue Grid Email Sidebar permissions to work with your Salesforce data
Activate synchronization
Once you log in to RG Email Sidebar with your Salesforce account, RGES will ask you to connect to your Office 365 account to enable RG Sync engine.
If you skip this setup step, you can still run and use RG Email Sidebar, except for the key functions carried out by RGES Sync.
Important
If you are using several different mailboxes for your correspondence (not aliases), make sure to authorize RGES Sync for the same mailbox as one for which you installed the Add-in, otherwise the Sync engine functions will work incorrectly even though RGES Sync will appear to be running
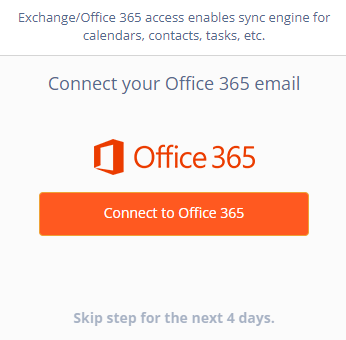
6. Click Connect to Office 365. A browser window with Office 365 login page will be opened
7. Enter your Office 365 login credentials in the O365 OAuth 2.0 dialog or pick an account from the list when available
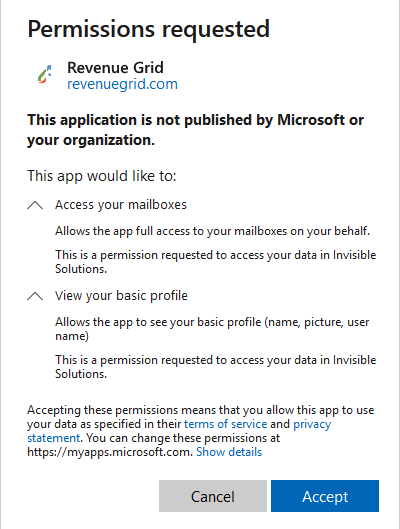
8. Next, click Accept to grant Revenue Grid Email Sidebar permissions to work with your Office 365 data
Note, that you may not see this dialog if permissions were granted earlier by you or your admin.
After access has been authorized, RGES Sync will start running every 30 minutes 24/7 for this email account.
Also, refer to these instructions if you want to pause the synchronization or completely disable RGES Sync Engine.
Note
You may update both Office 365 and Salesforce accounts in sync settings at any point later. Refer to this article to learn how
Tip
Refer to this article to learn what emails and calendar items you have in Office 365 will be auto-saved in Salesforce if you enable the corresponding settings (calendar items auto-saving, emails auto-saving) after setting up Revenue Grid synchronization
III. (Admins only) Install the Managed package in Salesforce
To enable the full scope of features offered by RG Email Sidebar several minor adjustments must be made in your Salesforce Org’s configuration; installing the Revenue Grid managed package allows to accomplish that quickly and effortlessly. Follow the above link for complete information about the package.

We would love to hear from you!