
Made of the most often
asked questions we get from you!
1. How to add a prospect to a Sequence?
There are a couple of ways to do that, on Sequences' Recipients tab or via the Sidebar Widget.
On Sequences' Recipients tab, to which you get from Sequences→Click on a sequence you want to add a recipient to→Recipients tab
1. Click  button in the upper right-hand corner
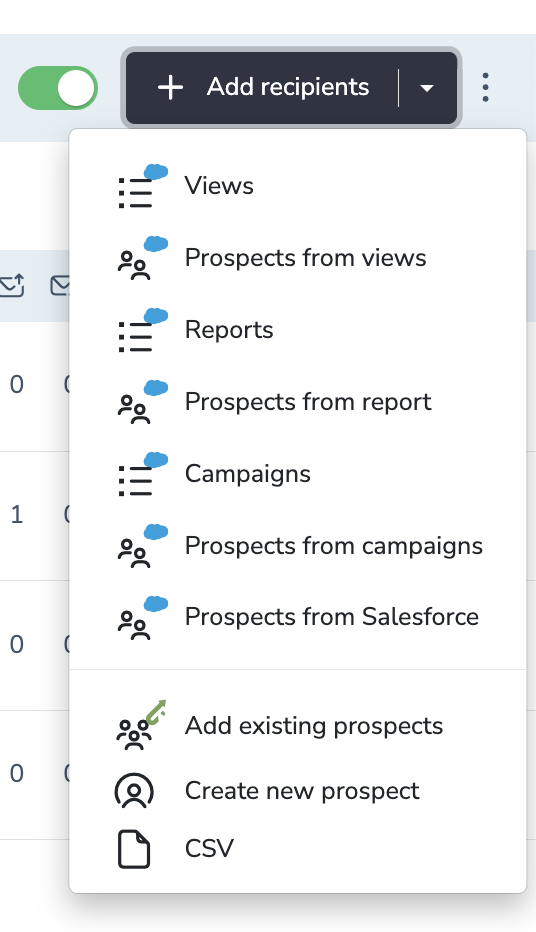 2. Then in the appeared drop-down menu; choose where do you want to add recipients from
You may add:
• all contacts from a certain Salesforce view
• handpicked contacts from a certain Salesforce view
• prospects from Audience page, who have been imported to Revenue Grid earlier
• import from a CSV file from your local computer
Via the Sidebar Widget, which you open by clicking on the right-hand side in the Action Center or on the Audience pages. Once opened, you'll see Sequence Widget on the bottom of the sidebar. Click
  in order to choose an existing Sequence from the opened dialog box and click
2. How to pause a Sequence for a specific prospect?
There are multiple ways to pause a sequence for a recipient. One of the ways is to perform this action on Audience page.
1. Go to Audience page
2. Search the prospect(s) who you want to stop a Sequence for
3. If it is a single prospect, then click ![]() icon and click Pause; if you are trying to pause a sequence for several prospects, then you will have to perform Mass action: Select the checkboxes and click
icon and click Pause; if you are trying to pause a sequence for several prospects, then you will have to perform Mass action: Select the checkboxes and click ![]() icon appeared in the upper right corner of the page, and click Pause
icon appeared in the upper right corner of the page, and click Pause
Also there is a similar way to pause a sequence for prospect(s) on the Recipients tab of a Sequence and via the Email Sidebar
3. How to use Merge Fields?
 1. Put a cursor where you want an auto-inserted value to appear in your message in a text editor
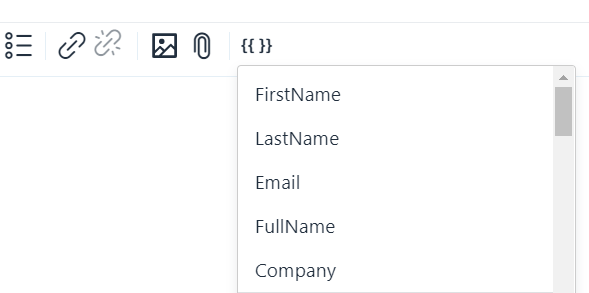
2. Then type "{{" so a drop-down with values appears
3. Choose a desired one by clicking on it or type the value
Alternative way…
 1. Put a cursor where you want a value to appear
2. Instead of typing "{{", use  icon on the toolbar of the text editor
3. Choose a desired one by clicking on it
Preview the result
 In order to preview a message, you should first switch the editor to the preview mode.
Additional info
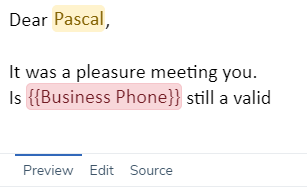 While previewing, merged values will be highlighted: Yellow indicates that relevant data was retrieved successfully; Red indicates that relevant data is not populated in Salesforce for this prospect.
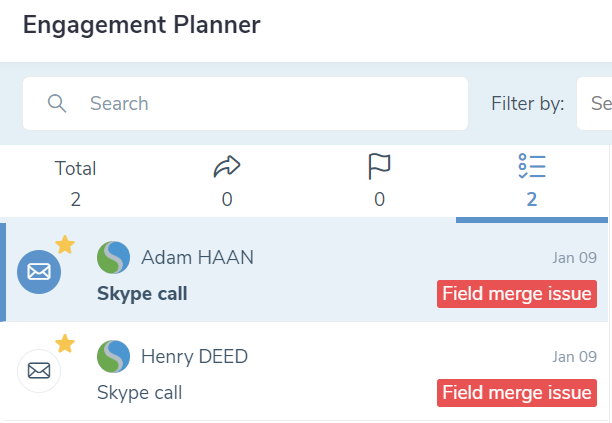 When it's red, meaning not able to fill the value, the automated email will not be sent out and the sequence for this prospect will be paused. In order to let you know about the issue, RG will notify you on Action Center's To-Do tab so you resolve the issue either by editing body of your message manually (e.g. removing the merge field tag) or by populating the value in Salesforce so RG can pick it up.
Commonly used merge fields are: Lead/Contact name, company name, RG Sequence owner name as well as your email signature and unsubscribe link.
4. How to insert a signature into an email?
You can add a pre-made signature via one of the Merge Fields tags.
 1. Put a cursor where you want a signature to appear in the text (whether when replying from the Action Center or creating an email type of a step)
2. Type "{{"
3. In the appeared drop-down choose 'User signature' or 'User Secondary signature', depending which signature you want to use. Refer to this article for details.
{{Auto inserted Signature}} merge field tag
Keep in mind that based on selected preferences of auto-adding a signature to sequence emails in signature settings, you may see a special tag, {{Auto inserted Signature}}, in the email body editor when creating or editing an email type of step.
Preview the result
Merge field tag will be replaced with one of pre-made signatures saved in Settings→Signature tab. In order to preview a message, you should first switch the editor to the preview mode.
5. How to Opt-out a recipient from a sequence’s outreaches?
There are a couple of ways to do that, on Sequences' Recipients tab or via the Sidebar Widget or on the recipient's profile page.
On Sequences’ Recipients tab
1. Go to Sequences page→Sequence name→Recipients tab
2. Select a checkbox next to a recipient who you want to opt-out
3. Click the appeared ![]() icon on the upper right-hand side, and choose Opt-out
icon on the upper right-hand side, and choose Opt-out
Via the Sidebar Widget
 1. Open the sidebar by clicking on the right-hand side in the Action Center or Recipient's profile pages.
Once opened, you'll see Sequence Widget on the bottom of the sidebar, where all sequences a recipient is engaged into will be listed
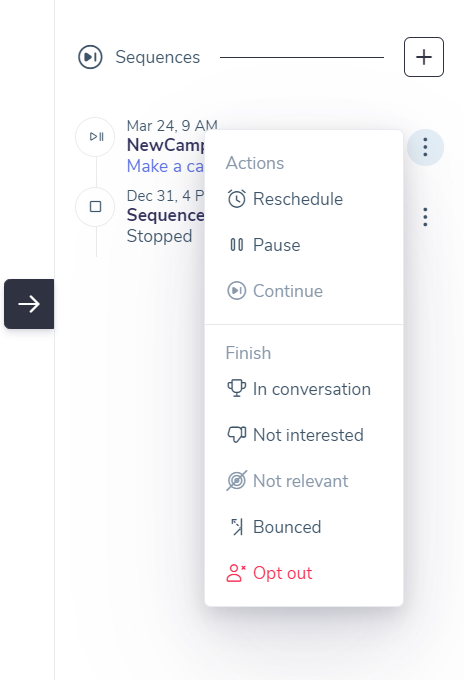
2. Click  next to a sequence which you want to opt-out a recipient from
3. Choose Opt-out from the menu
On the recipient's profile page - this opts out a prospect from all sequence he/she is engaged into.
 1. Go to recipients profile by clicking on prospect's name wherever it is clickable: in the Action Center page, Recipients tab of the Sequence, or on the Audience page
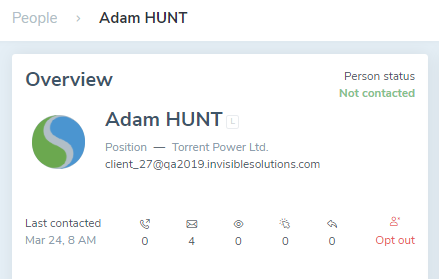
2. Click Opt-out in the Overview area
6. How Revenue Grid acts when a CC-ed recipient replies to my email?
A lot depends on who has been added to CC field:
- a main recipient's colleague who is also enrolled into the same sequence
- anybody else
In case if you receive an email from CC-ed recipient, who is a main recipient’s colleague and also enrolled into the same sequence:
Such email appears on the Notification tab in the Action Center, which you may reply to or dismiss. Meanwhile for your main recipient, 'Colleague’s Reply' item gets created on To-dos tab in the Action Center. Such item pauses a sequence for the main recipient until processed manually.
In case if you CC-ed anybody else:
Such reply, even if it's an auto-reply or a bounce, will appear on Notification tab in the Action Center and a sequence for the main recipient will not be paused.
Important
Select 'Pause sequence and create a To-Do item on reply from the same company' checkbox in Sequence's Settings in order to intercept such occurrences.
7. What is Person Status in Revenue Grid?
As soon as imported to Revenue Grid, every prospect gets assigned to “Just added” status and then changes depending on prospect’s behavior within a Sequence. Person status helps to identify on what stage a prospect currently is. Some status changes are automatic, while others initiated by Revenue Grid user.
For example, status lifecycle may develop from “Just added”→”Not contacted”→”Approaching”→”Success”. For detailed information about every status, refer to this article
When a prospect’s status changes in Revenue Grid, it may get reflected in Salesforce according to custom mapping.
8. How to add an unsubscribe link to an email?
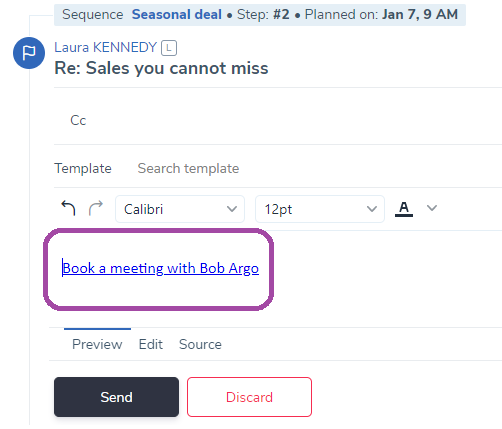
In the text editor, whether when creating an email type of a step or when creating a template, do following:
1. Put a cursor to the end of your email where usually unsubscribe links appear
2. Type "{{" so a drop-down with Merge Field values appear
3. Choose "Unsubscribe Text"
The Merge Field tag will be replaced with a premade unsubscribe text which you can add/edit in Settings→Unsubscribe
Preview the result when creating an email type of a step
In order to preview a message, you should first switch the editor to the preview mode.
9. How to add targeted recipients to a Sequence from Salesforce report?
Easy! Revenue Grid supports Salesforce reports of any type that have Contact/Lead ID column in it.
Go to Recipients tab of your Sequence and select “Report” from “Add recipients” drop-down.
Follow the dialog that show you Salesforce reports you have access to, and pull the recipients in.
Refer to these articles for detailed guides on how to import recipients from different sources.
10. What data get synchronized from Revenue Grid to Salesforce?
Emails:
You can have all Revenue Grid incoming and outgoing emails automatically saved to Salesforce as Tasks linked to relevant Contacts or Leads. There are two ways to enable email auto-saving:
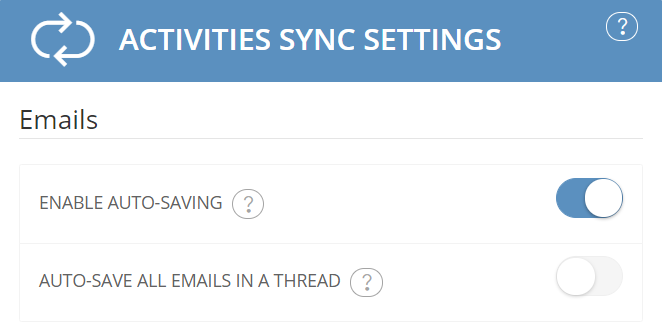 1. Go to Sync settings page via the Email Sidebar (Settings Dashboard will be opened in a new Web browser tab) → Detailed Settings → ...and enable the switch button next to 'ENABLE AUTO-SAVING' in ACTIVITIES SYNC SETTINGS section. Refer to this article for more information about sync settings
2. Alternatively, you can have emails auto-saved automatically if such feature is requested during Revenue Grid implementation.
Hint
Auto-saving happens along with the next synchronization session. By default every 30 minutes unless manually forced on the Sync Settings Dashboard.
Calls:
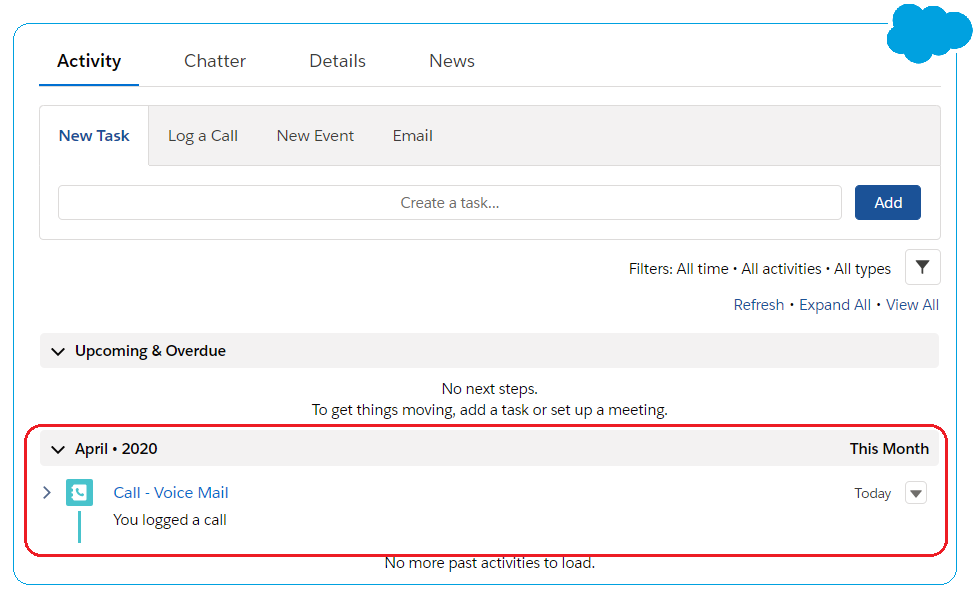 By default, all calls which get logged on To-do tab in the Action Center get created in Salesforce during the next Revenue Grid Synchronization session.
11. Scenarios when targeted contacts forward your email to someone else
Roles:
1. Revenue Grid user from whose inbox the sequence is sending emails. See sequence level setting called Email are being sent on behalf of for more details
2. Jim is being engaged by your sequence.
3. Tom has never been in any of sequences of anyone in your organization.
4. Megan have been engaged by other sequences, thus listed on Revenue Grid Audience page
Scenario 1.
Jim receives an email generated by the sequence, keeps RG user in To/Cc field and forwards it to Tom.
Result: RG user gets a new Notification or Reply in the Action Center for Jim, and all sequences Jim is engaged in get paused.
Scenario 2.
Jim receives an email generated by the sequence, forwards it to Tom without RG user in To/Cc field. Then Tom adds RG user to To/Cc field and replies to the forwarded email.
Result: RG user gets a new Notification in the Action Center for Jim, and all sequences Jim is engaged in get paused.
Scenario 3.
Tom composes a new email, adds RG user to To/Cc field and sends it to Jim and.
Result: RG user gets a new Notification in the Action Center for Jim, and all sequences Jim is engaged in get paused.
Scenario 4.
Jim receives an email generated by the sequence, forwards it to Megan without RG user in To/Cc field. Then Megan adding RG user to To/Cc field and replies to the forwarded.
Result: RG user gets new Notifications in the Action Center for Megan and for Jim. All sequences Megan is engaged in get paused.
Scenario 5.
Megan composes a new email to RG user, with Jim in To/Cc field.
Result: RG user gets new Notifications in the Action Center for Megan and for Jim. All sequences Jim is engaged in get paused.
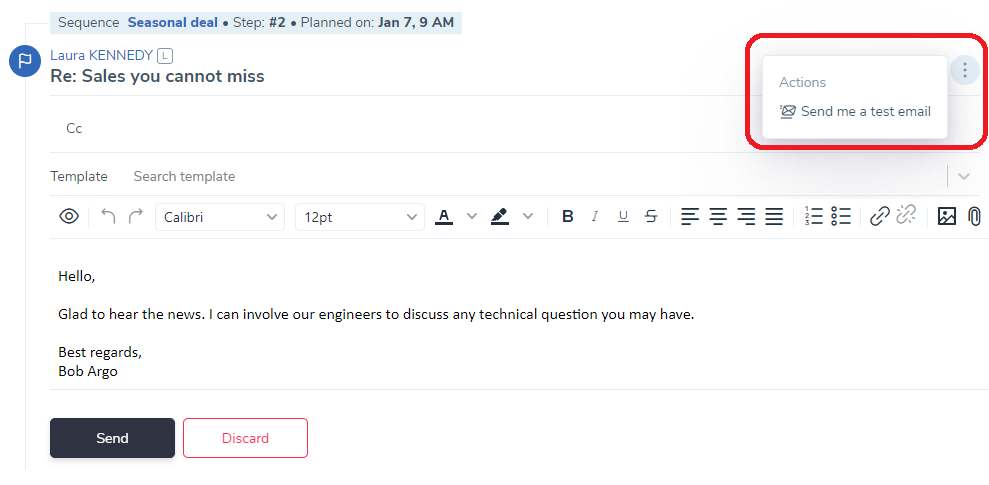
12. How to use “Send me a test email” functionality?
You can send a test email to yourself in order to eyeball how recipients will see your message.
This function is available when replying to emails in the Action Center, and when creating an email type of a step.
in the Action Center, when replying to a prospect:
You can always send yourself an email you are preparing for a prospect, just to eyeball how a prospect will see on the other end. Click the more options icon  , and then "Send me a test email
On the Sequences tab, when creating a new email type of a step:
In order to send a test email, you should first switch the editor to the preview. Once you do that, a clickable button Send me a test email will appear next to Send/Save and Discard buttons under the text editor. Click Send me a test email and you will receive the email within a minute.
13. How to deal with bounced contacts?
It happens that once the first step of a sequence gets executed, you receive several bounced replies. One of the reasons you get bounced replies is email addresses have been misspelled in Salesforce. So what to do in that case? The best practice is:
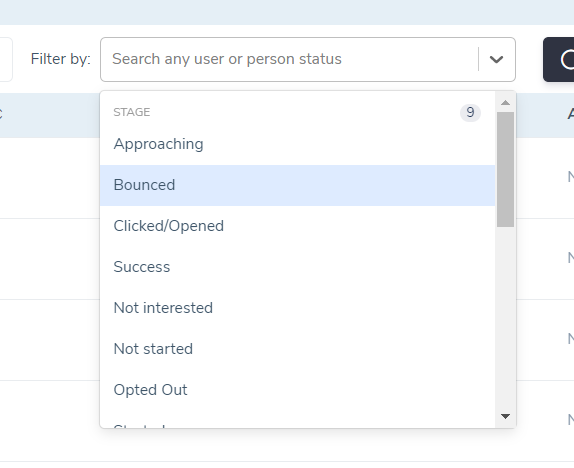 1. Go to the original Sequence->Recipients tab, and filter by "Bounced". Now you have a list of exact prospect who have been bounced.
 2. Fix their records in Salesforce or remove unneeded once via the More Options icon
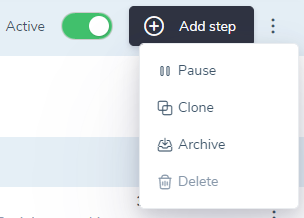 3. Clone the original Sequence on the Overview tab
4. Then on the Recipients tab of the original Sequence, select  all prospects who are bounced, then click the More Options icon in the upper right hand corner of the tab, and click Add. In the appeared pop-up, select the cloned sequence.

14. How not to get flagged as SPAM when sending emails in bulk?
Here are a few key recommendations you should follow when sending many emails to avoid getting flagged as spam, whether by spam filters or by recipients.
Recommended
• Personalized subject and greeting will be considered as a good sign
• Reputation of a sender grows when a sender sends a sequence of emails with requests to response
• Add links to body of your email. All the links must be directed to the same domain (doesn't apply to social media outlets)
Not recommended
• Sending promo-emails where images prevail text
• Using link-shortening services (email clients usually consider it as phishing)
Forbidden
• Sending attachments in the first email. Attached files can be sent only if there has been a reply to your email
Sender domain security
• Comply with Sender Policy Framework (SPF) - an email authentication method. Sender's security on the record indicates the IP and services from which emails are allowed, DKIM and DMARK records in the configuration of your domain for mail.
• SPF description and recommendations from Google
• DKIM description and recommendations from Google
• General Outlook Recommendations Outlook postmaster
Parameters that indicate level of trust in Office365
• SPAM confidence level (SCL) in Exchange Online Protection
• Configure anti-spam policies in EOP
The percentage of spam complaints should not exceed 0.5%
Rules of email servers regarding Unsubscribe links
• Not required in case of one-to-one correspondence
• It is must have if an email has signs of bulk reach out
For the sender's reputation, it is better if a recipient unsubscribes rather than marks an email as SPAM.
15. How to import your MS Outlook signature into Revenue Grid?
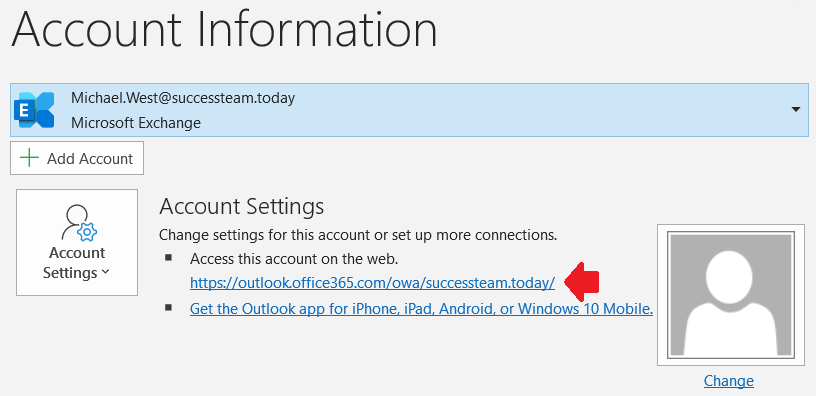
- Go to Outlook->File and in the Account Information area, click on the link “Access your account on the Web:”
- In the opened browser, go to Sent Emails folder and pick any email with your signature in it
- Select the signature with a cursor and copy it to clipboard (Ctrl+C)
- Then go to Revenue Grid -> Settings -> Signature, and paste (Ctrl+V) it into one of the text editors: Default or Secondary signature.
The format of your signature will be preserved when copied from Web page, rather than when copied from desktop version of Outlook.
For more details about Revenue Grid Signatures, refer to the article.
16. How to pass along your Revenue Grid Signature to a teammate?
Revenue Grid supports very sophisticated signatures, which you can either build using formatting tools or import from an email client. If you want to pass it along to a teammate so he/she simply changes his/her name and contact details but preserves the format which you have built, then follow the steps to share the signature:
1. Go to Settings -> Signature
2. Switch the editor to the Source mode on the bottom of the editor
3. Copy (Ctrl+C) the whole HTML code to clipboard
4. Send it to a teammate to paste (Ctrl+V) it to the same Source code area of the editor
When a teammate switches back to Edit mode, now the signature appears in the editor area in the exactly same format as yours. What's left is, change name and contact details and click Save.
For more details about Revenue Grid Signatures, refer to the article.
17. How email opens and link clicks get counted?
There are 5 screens in Revenue Grid which show how many times prospect(s) opened your emails  and clicked on links
  which you add to the text of those emails. Here It is explained how exactly email opens and link clicks get counted on every each of the screens.
1. and 2. Audience page / Prospect profile
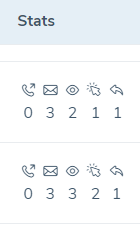 This is total count of unique emails that a prospect opened, and total count of unique links that a prospect clicked across all sequences.
Opens if a prospect opened the same email multiple times, then it still counts as one
Clicks if an email contains multiple links and a prospect clicked them all, then count of clicks will be higher than count of email opens
- Sequence → Recipients tab
This is count of email opens and link clicks within the sequence.
Opens if a prospect opened the same email multiple times, then it still counts as one
Clicks if an email contains multiple links and a prospect clicked them all, then count of clicks will be higher than count of email opens
- Sequence → Statistics tab (Metrics)
This is count of unique prospects that opened at least one email, or clicked on at least one link within the sequence.
Opens if a prospect opened all emails of the sequence, then it still counts as one
Clicks if a prospect clicked on multiple links within an email, it's still counts as one
The percentage shows relation to number of prospects that were contacted by this sequence. If a prospect was added to the sequence but hasn't been reached out yet, then it doesn't get into calculation of the percentage.
- Sequence → Statistics tab (Graph)
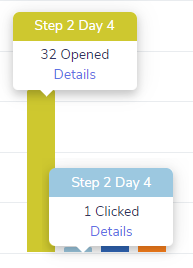 This is count of unique prospects who opened an email, clicked a link on a certain step of the sequence.
Clicks if a prospect clicked on multiple links within an email, it's still counts as one
18. How to create flashy HTML templates?
HTML rich emails can grasp attention of recipients and ignite interest to your product. In Revenue Grid you can create such email type of a step when building a Sequence, or a template.
As an option, you can use third party HTML email builders like www.beefree.io or www.stripo.email. Such email editors all have export option, for you to import it to the Source tab of Revenue Grid email editor.
Otherwise, you can simply select a part of a web page, copy it, and paste it to the Source tab of Revenue Grid email editor like it is shown on the gif below.

Steps to create such template:
1. Go to Templates, through the left hand side navigation panel
2. Click 
3. In the opened text editor, click Source on the bottom of the editor
4. Paste the copied content from a web page
5. Switch the editor to the Preview mode to examine the layout
6. Name the template and choose preferred Sharing option
7. Click Save
19. How time zones affect timing when a sequence sends out emails?
With Revenue Grid your recipients will never get an email not within business hours of every each of the recipient. There are multiple controls are in place to prevent such occurrence.
First and foremost, every sequence sends every email within hours you specify in Schedule. Schedules has nothing to do with time zones yet.
But when another email is getting ready to go out, Revenue Grid first checks prospect’s country specified in Salesforce and makes sure to send an email according to Schedule in the country’s time zone.
If Country field for the recipient is blank in Salesforce, then Revenue Grid will send the email according to preferred Sequence’s time zone in the settings
20. How to insert “Book me” link into your signature, template or body of an email sent from Revenue Grid?
As you know Revenue Grid offers the Share Calendar Availability (Book me) feature which allows parsing your available time slots based on your MS Exchange/Office 365 calendar data to be sent to your business contacts. It drastically eases the process of booking a meeting with your business contacts, just add “Book me” link to your email, and let your recipients to choose a time slot suitable for them.
Follow these steps in order to add such link to your signature, template or right to an email sent from Revenue Grid:
1. Open your email in a web browser
For MS Exchange and Office 365 users: from your Desktop Outlook, go to File and click Access this account on the web.
- Start composing a new email
- Click on Revenue Grid icon, and choose Quick Send Availability
- appeared in the email body text editor
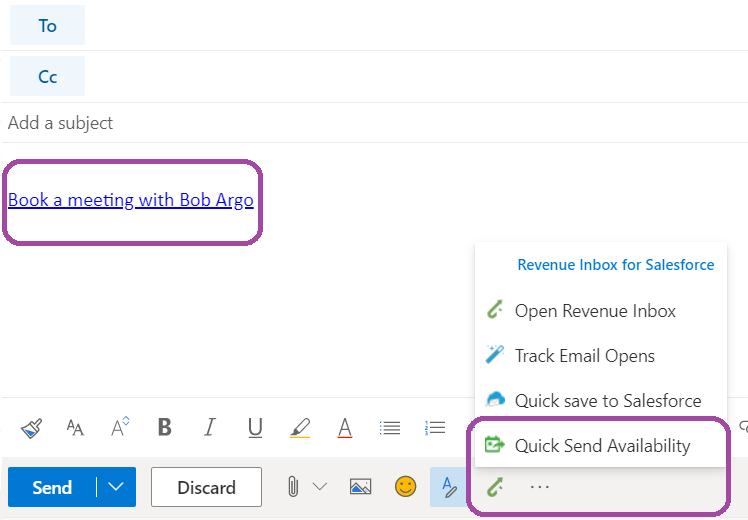
- Paste it to wherever you need it in Revenue Grid, whether to your signature, template editor, or to an email when replying from the Action Center.
21. How to personalize outreach just for few recipients in a large sequence?
Say you are setting up a new sequence (original). Using “Add recipients” button on the Recipients tab, added a certain number of prospect from SFDC, CSV file or from prospects who have been already imported to Revenue Grid.
While looking through the added prospects, you decide that some of them to get reached out in a different manner rather than the rest, with different email texts or engagement approach.
In this case you need to Move the selected prospects to another Sequence (cloned) and edit steps of the cloned sequence accordingly.
Follow these steps in order to achieve that:
- Go to Overview tab of the original Sequence
- Clone the original Sequence. Once you click “Clone”, you will get to the cloned Sequence
- Go back to the Recipients tab of the original Sequence
- Select checkboxes next to those specific prospect who to get reached out in a different manner
- Click the “More Options” icon appeared in the top right hand side corner of the tab
- Click “+Add”, and choose the cloned Sequence from the drop-down
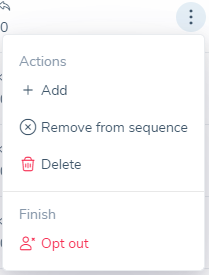
- Then right here on the same tab of the original Sequence, select checkboxes next to the same specific prospect again, click the “More Options” icon appeared in the top right hand side corner of the tab again and choose “Remove from sequence”
- Now go to the cloned Sequence and edit the steps of the Sequence accordingly
22. Why is it important to keep a close eye in the Action Center and process all the items appearing on it as soon as possible?
Any given item in the Action Center (a reply, a notification, a to-do type of an item) is dedicated to an individual recipient from one of your sequences.
The bottom line is, until you handle the appeared item, the recipient will not move forward within a sequence. The sequence will be on pause for this particular recipient.
These types of items in the Action Center pause a sequence for a recipient:
on the Replies tab
☑ Replies to any step of a sequence
on the Notifications tab
☑ Notification about Undeliverable emails
☑ Autoreplies
☑ Standalone emails
☑ Meeting invitations
☑ Meeting invite response
on the To-dos tab
☑ Review and Submit an email
☑ Colleague's Reply
☑ Log a Call
☑ Send SMS
☑ Log a Misc. type of a step
☑ Merge Field issue
☑ Owner Change
☑ Lead conversion
☑ Error sending
For example:
Say, for a particular recipient, Alex, you have gotten a Merge Field issue on the To-do tab. That means, until you fix it manually, Alex will not receive any following correspondence you had scheduled into the steps of the sequence he is enrolled in.
23. How to add an unsubscribe link directly to your signature, so you don’t have to add it every time to emails or steps manually?
In order to avoid extra time adding an unsubscribe link to every email or step you intend to send out, add it once to your signature. Follow the steps to achieve that:
1. Go to Settings → Signature
2. Put a cursor where you want an unsubscribe link to appear, usually in the very bottom of a signature.
3. Click Merge Field icon and choose {{Unsubscribe Text}}
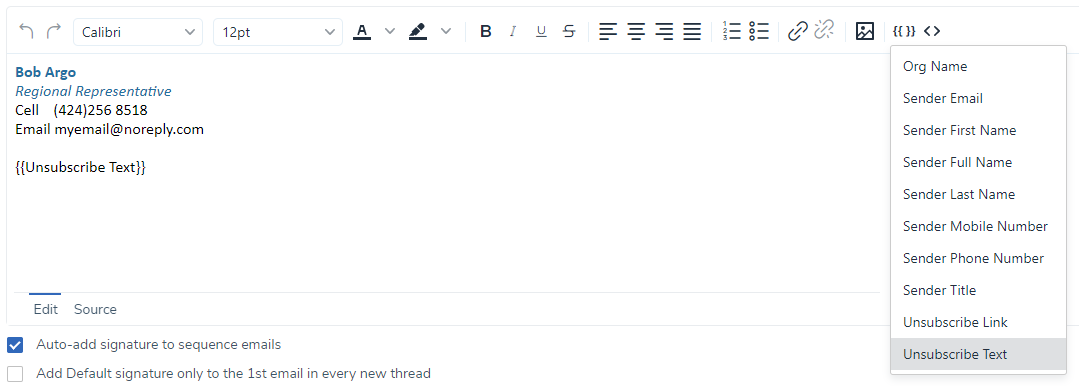
4. Click  button so changes get applied
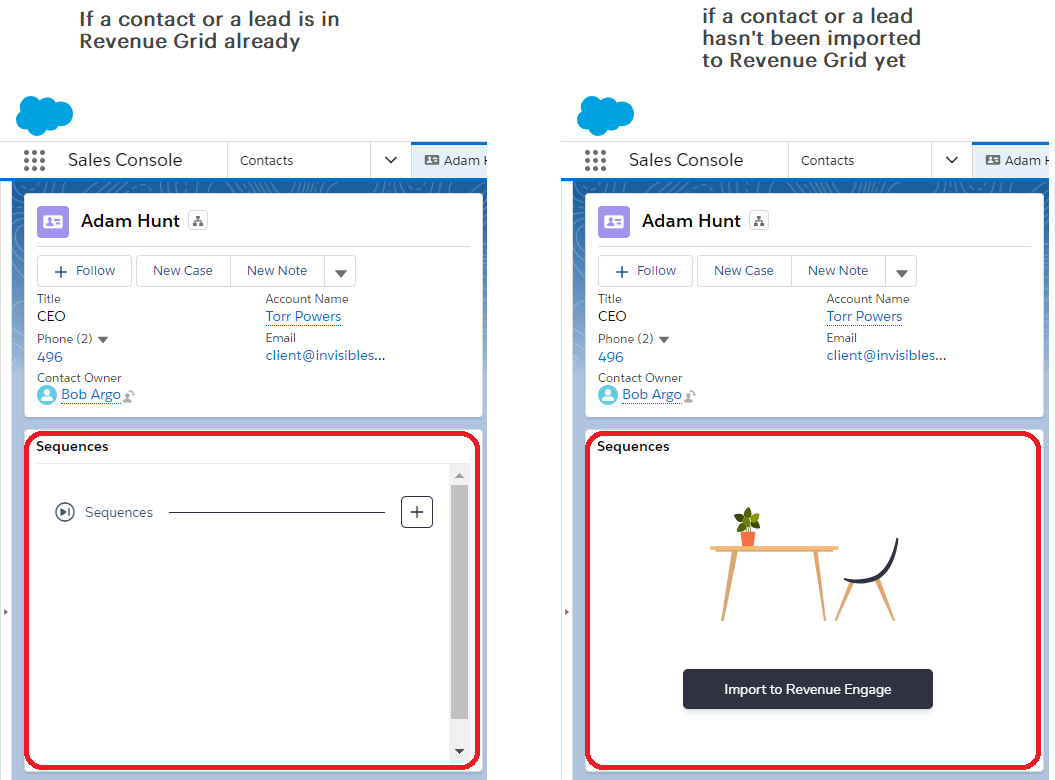
24. How to add a person to a sequence right from your email client through Revenue Grid Side panel?
 1. Click on a contact or a lead in the Sidebar to see the pad with details
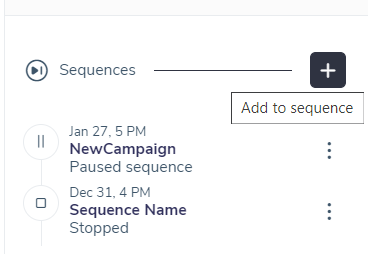
2. Switch to Sequences tab
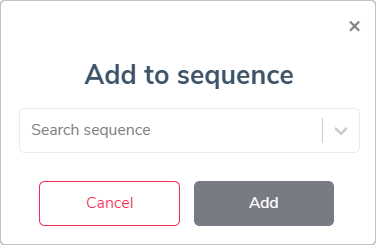
3. Click 'Add' icon
4. Select a sequence in the drop-down and click 'Add' button
Note, that if a contact you are trying to add to a sequence hadn't been imported to Revenue Grid at the moment, then on the Sequences tab you can easily import it with just a single click
Read more about controls over Sequences from Revenue Grid Sidepanel
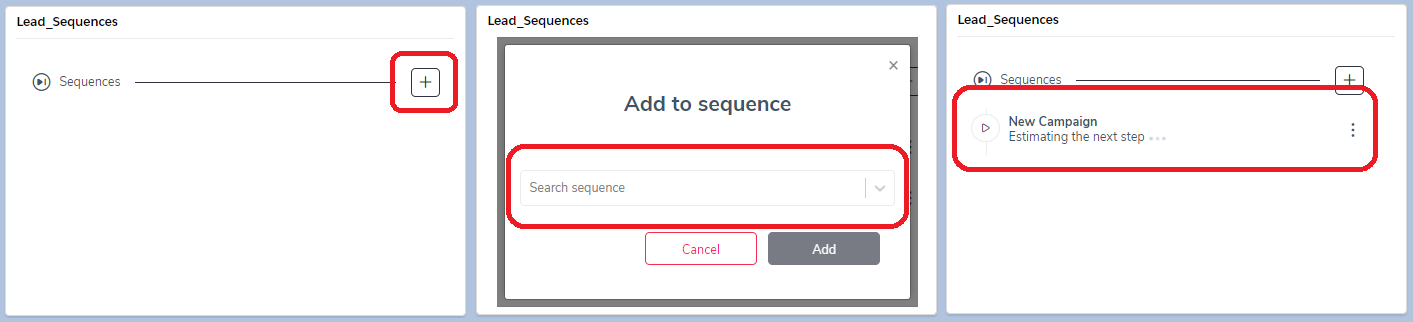
25. How to add a person to a sequence right from SFDC interface?
In order to be able to add a contact or a lead to a sequence right from SFDC interface, you have to set up Revenue Grid Sequences widget first.
Once it’s set up, it will like this on Contact or Lead screens in SFDC:
For those contacts and leads who have been imported to Revenue Grid, follow these steps to add them to a sequence:
1. Click  icon
icon
2. Choose a sequence you want to add to from the drop-down
3. Click Add button, and as a result, the selected sequence will appear in the widget. Through the widget, you also have certain control over the engagement within the sequence. Read more here
26. What happens when you edit a Template?
Be cautious when you edit a template. Before editing a template, be aware of sequences which have steps built using the template.
When a template gets edited, all steps which the template had been used for will be updated seamlessly. Whether the template-based step is automatic, then the updated outreach will be carried out in its timely manner; or the template-based step is manual, then the updated draft will be waiting for you in the Action Center.
Important
Editing at least one character of a template step, will make the step immune to template edits. Say, you want to build a step based on a template. You pull it in by choosing from the templates drop-down, and then add few extra lines to its text in the editor. In such cases, the step is no more linked to the chosen template, and thus will not be affected if the template gets edited on the Template tab.
27. How does the exact time of sending the next email gets calculated?
It all gets figured out by the state of the art algorithm under the hood. Normally, once a user activates a sequence, all its recipients get queued into one stack which shoots emails and SMS one after another within the selected delivery schedule and Schedule idle. The general bandwidth is 1 email per minute.
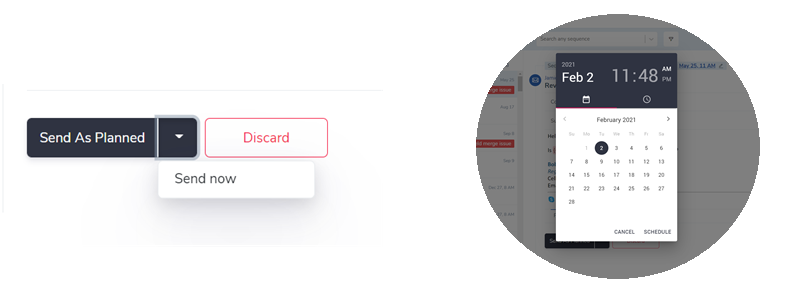 But there are cases when a user clicks "Send now" button or schedules a certain email to be sent at a specific time in the Action Center.
In such cases, the queue gets shifted and such email cuts the line to get sent out on demand.
Another factor affects queuing is email bandwidth limits.
For example, if you hit the limit of "Number of sequence touches a RG user can send per day", then the rest of the steps will be sent out not necessarily on the flowing calendar day, but on the following day within sequence's delivery schedule.
⚠️ And there will be a special indicator for queued prospects appearing in the Next step column on the Recipients and Audience tabs.
To sum up, the algorithm considers every email’s priority, your and your company’s email bandwidth limits and a Sequence’s delivery schedule, and as an output, builds the most optimized queue to distribute outreaches.
28. How to create a sequence which sends emails only on Thursday?
Say you need a sequence of three emails to get sent on Thursdays only. The first email on the upcoming Thursday, the second on the following Thursday in a week, and the third email on the Thursday coming after that.
Follow these steps in order to set up such a sequence to reach out your prospects only on a certain day of a week.
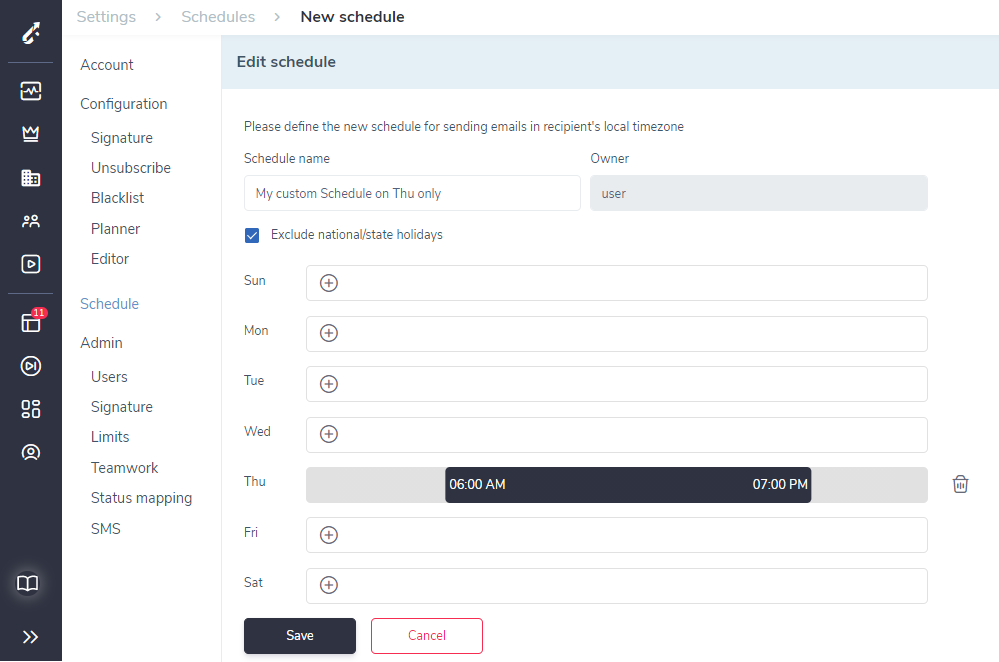 1. First, you have to have a Delivery Schedule which would be set only to that particular day of the week.
Go to Settings -> Schedule
Click  in the top right-hand corner.
Create the schedule.
Read more about creating a schedule.
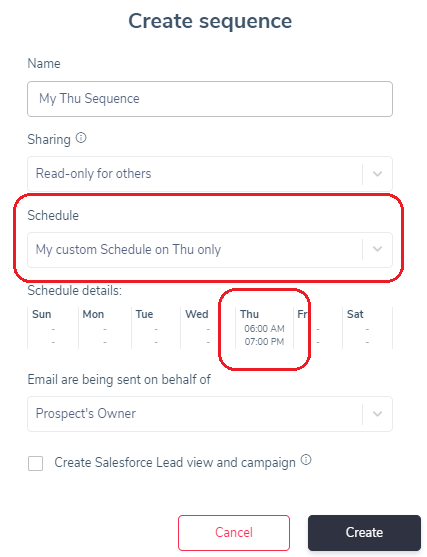 2. Next, make sure you select this schedule when creating a sequence.
Also you can change an existing sequence's delivery schedule on the Sequence's settings tab.
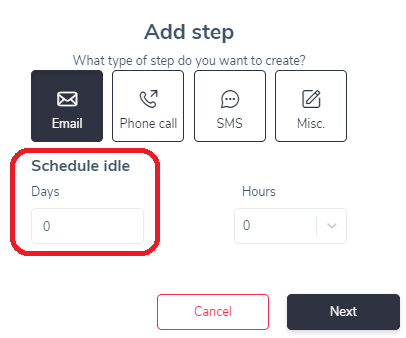 3. Now, it's time to create the 1st steps of the sequence.
For the first step, make sure you select 0 days in the Schedule Idle field. That way, the Sequence will start sending the first outreach on the closest upcoming Thursday.
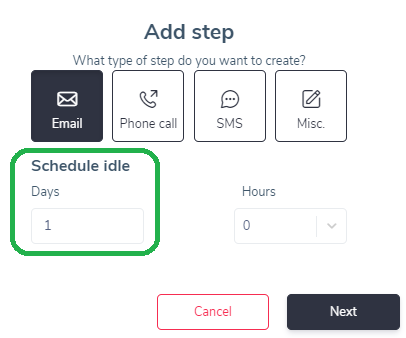 4. When creating the 2nd and the 3rd steps though, it's very important to set 1 day in the Schedule Idle field.
If you keep the field at 0, then all 3 emails may get sent out on the same Thursday, and that's what you want to avoid.
You can modify the value even for the existing steps. Just double click the step on the Overview tab of the sequence, and update the field in the bottom right-hand corner of the editor.
29. What folders in an email client get synced with Revenue Grid?
By default, emails only from Inbox and Sent folders of an email client get captured by Revenue Grid.
But by a quick request to our Support team, you can easily have any sub-folder to get synced with Revenue Grid.

We would love to hear from you!